Showing posts with label Waterfall Scrapbook. Show all posts

Wednesday, March 20, 2013

Mixed Media Waterfall Album

Hello!  I'm pre-scheduling this post, so I'm thinking this will be mid week by the time you see this.  I told you I've been busy crafting right?  Yup, when the creative juices are flowing, you have to seize the day and make as much as you can.  I stayed up till 2am over the weekend working on lots of projects, so now I have lots of stuff to post!

OK so as I was watching Prima Live with Leeza Gibbons, and Frank's previous Prima Live show featuring Leeza's new waterfall album, I was inspired to make my own version.  Yes, there are no stores here  in Hilo that carry that album, so I thought I'd try to make something similar.  Here's what I came up with.. yes, not nearly as nice as the Prima version, but enough to satisfy me...


I started with some cereal boxes for my covers.  Used my new Sunrise/Sunset papers by Prima.  LOVE THEM!  I chose the lace printed ones for the covers.  After I covered both, I punched the holes using my cinch and attached the binding.

Then I started decorating the cover... started with some chicken wire I bought from our local Ace store and sprayed it with white paint to help rustproof it.  After cutting down the wire to the size I wanted, I adhered it using my hot glue gun.


Then I added some burlap leaves I cut using a Sizzix die and burlap fabric.  The fabric was a light sage color, so I used my distress stains again to make the color how I wanted it to look.  Then I added some gesso to make it look distressed.  After going through my stash, I picked out some flowers by Wild Orchid Crafts, some shabby flower trim, pearls and metal flowers from the sunrise/sunset collection.  I also pulled some wood mushrooms and leaves from Prima.  And do you see the keyhole above the mushrooms?  I cut that from a Tim Holtz die and painted it white.


After I was done with the cover, I got the key that was also cut from the same Tim Holtz die and painted it with gesso and added a white heart pearl by Doodlebug.  Used some twine to attach it to the binding.  On the other end of the twine, I added another metal flower, bauble and pearl


 And now for a look on the inside... I picked out different patterns from the sunrise/sunset line and cut them down to 6" x 9 1/2", and about 1 1/2" shorter for each layering piece.  There are 4 pages on each side, so a total of 8 pages.  I thought I could use the bulkier embellishments like flowers on the part that extends past the page above it.  Before adhering it down to the covers, I punched holes and attached them using seam binding.


Now I wish I had distressed the edges of the pages, but I thought it was just my prototype!  Oh well, maybe next time I'll remember to do so.

Tuesday, May 8, 2012

Happy Birthday Karen!

 My friend Karen (or KI as I call her), go back about 14 years now... Wow!  Has it been that long since I moved to Hilo???  Anyway, we met at work and developed a friendship centered around our love of crafting.  I got her hooked on stamping and now she has her own blog... Check it out here...

Yes, as usual, I'm very late in getting my b-day gifts out. I think its partially because I want to get a gift they'll like or take so much time making their present, that I end up missing their actual b-day. 

Since I got my hands on those new Sizzix flip it dies, I thought it would be a fun and easy card to make.


Love these Doodlebug papers!  Added in another image from Sister Stamps that will be making her debut in July.... She keeps popping up on my blog!  I can't help using her!


And I made this waterfall mini album while hanging out with some friends in Honolulu.  Finished it up by adding the butterfly by Memory Box dies (my new fave) and flowers by Wild Orchid Crafts and All Natural Accents.  This paper line is one of my new favorites by Bo Bunny!


Here's the inside.  Left everything blank so Karen could fill the pages with whatever she wanted to.

This shot shows how the waterfall mechanism works.


Happy Belated Birthday Karen... Hope you like the gift and find it useful!  That's it for now!  So totally busy right now its not even funny! Hope to work on more craft projects soon that I can share-  its hard since sometimes the things I'm working on is for upcoming releases and I can't necessairly share them with you now.. But all I can say is that we have some fun things planned for our next release, which is scheduled for July 1st.  Stay tuned for more info!

Tuesday, April 3, 2012

Happy Birthday Debi!

 As most of you know from reading my blog, Debi is my CBFF!  Yes, I made up this term because I think that these crazy acronyms are so funny, so I made up my own.  C-Crafty BFF!  I have other BFF's but she is my craftiest.  She's my go-to gal whenever I'm stuck on a project or have a question on technique. All I can say is I'm so happy she moved to Hilo!

So since we've been friends, I've taken her out for her b-day.  It's our chance to hang out and have some girl time.  This year, I was inspired to make something for her.  She's been helping me out from Day 1 of Sister Stamps and I really really appreciate all her feedback, samples, and other help she's given me.  Ok, I'll stop gushing now, but you get the idea.

I thought a mini album would be fun to give her since she could use it for whatever.  I got this paper pack during the Sale-A-Bration from SU this year and remembered that Debi told me that she liked the paper, so I decided to use it to make her mini.  The great thing about coordinated papers is that it takes the guesswork out of putting together a mini album!

Debi tends to like country vintage/shabby chic style crafts in addition to cutsie.  I guess its rubbing off on me cause now I'm liking that too. I added some flowers and bling to the cover, but left an open space so that she could put her own title if she wanted to.  I wasn't sure what she would use the album for, so I left that blank for her to play with.


In my first mini waterfall album, I only made the waterfall on the right hand side.  I wanted to do something different this time, so I made the waterfall on both sides so she could add more photos and journaling.  


This next photo is when you pull the left side.


And this is when you pull the right.  Obviously you can't pull both at the same time or they will collide!


Hope you enjoyed this mini, but more importantly, hopefully Debi likes it!  Waiting to post this until I can give it to her.

Thursday, March 29, 2012

What I've Been Up To

 While checking out blogs, I noticed that my poor blog has been neglected.  Only 11 posts for the entire year!  So sad.  So I'm gonna try to start posting more regularly- just hope I can keep it up. It's not that I've not been crafting, I have, just mostly working on Sister Stamps samples, which I post on that blog.  But sometimes its fun to take a break and do some other non-Sister Stamps projects too.

While blogging and YouTubing, I came across a tutorial that I've always wanted to try.  I've seen several versions, in various sizes, but pretty much the same concept of a Waterfall Mini Scrapbook.  I am not that big a fan of the regular waterfall card, but for some reason, the mini album version appealed to me.

I was so happy when the Doodlbug order arrived at Island Scrapbooking.  Their new lines are so darn cute, I couldn't help myself!  I just love new spring line and knew I wanted to incorporate it into my mini.  Here's the cover.. Decided to use the bird and tree house as the focal point.  Punched the lattice fence with my MS punch and layed it over the photo mat.  I didn't know what photo to put yet, so I used some removeable adhesive so that I could tuck the photo in when I'm ready.


When you open the mini, it looks like a regular book, but you can see the tab on the far right, which will tell you or the recipient to "pull me"!  


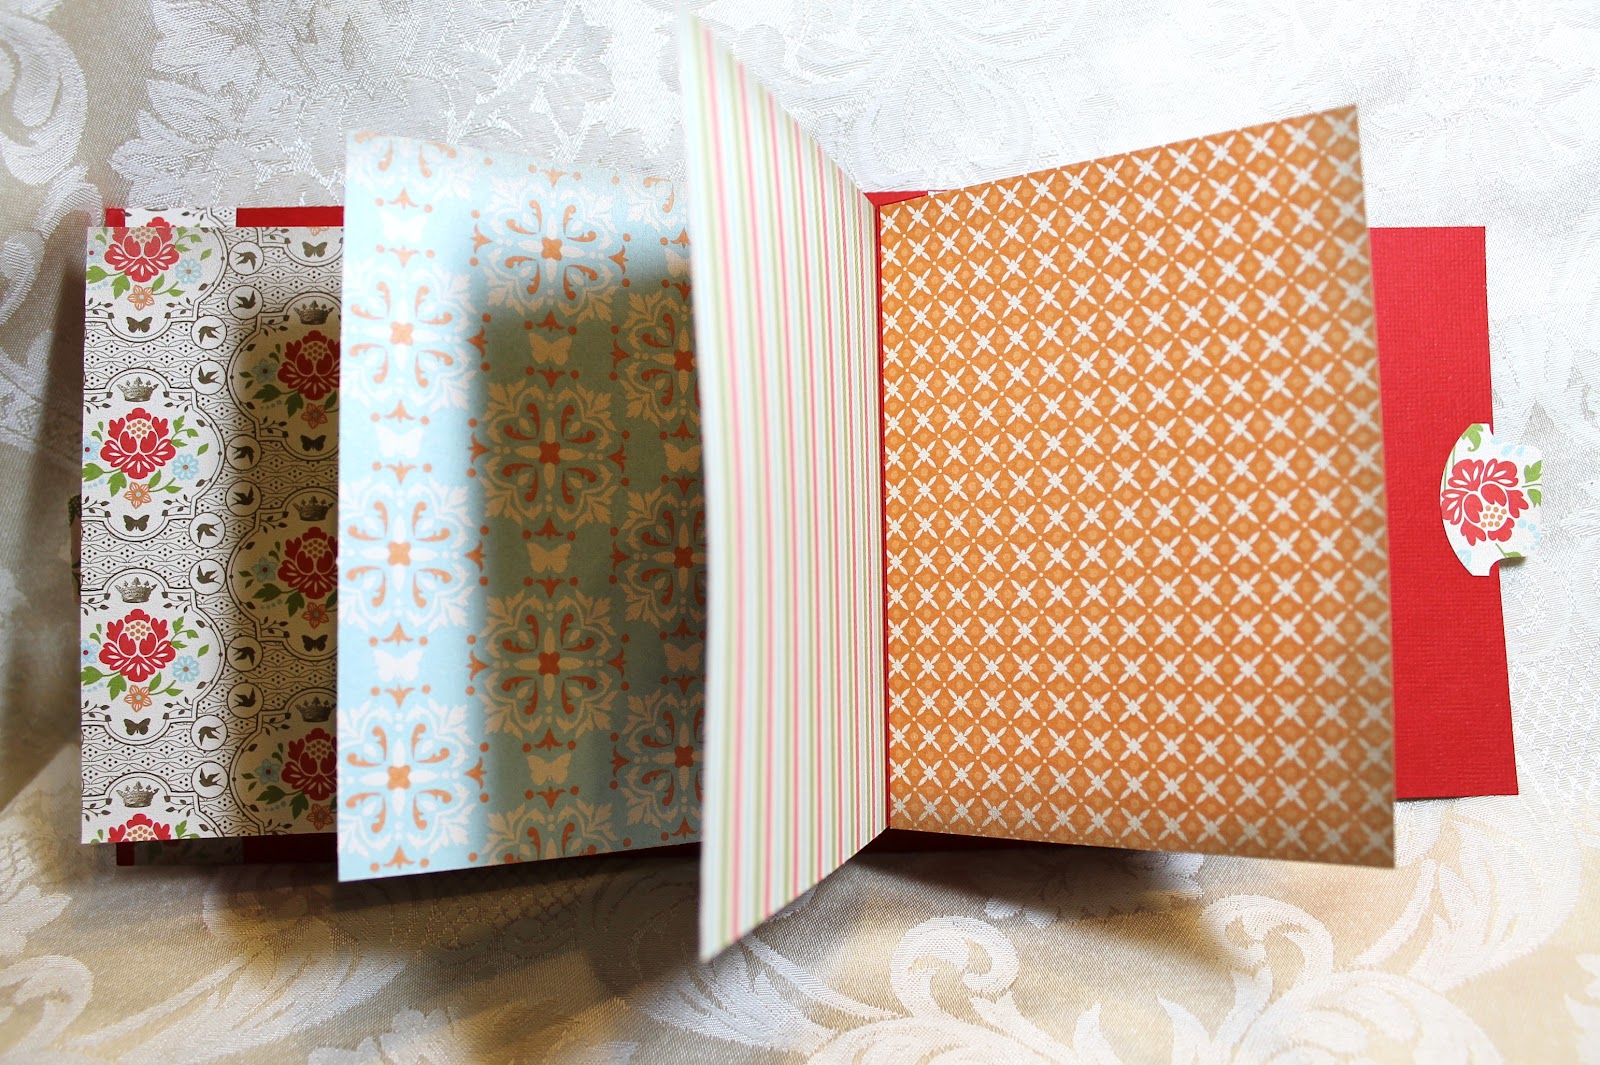
When you start pulling, this is what it will look like- I used other papers from this line for each page.  The nice thing about these papers is that they are 2 sided, so you can use both sides of the page for your photos or journaling.  Once I add in my photos, I'll add more embellishments from the same line like flowers, buttons, and cardstock stickers.


 As you can see, the pages start to get smaller and smaller towards the end.  You could also position it so that you flip the cover open up and pull the tab down instead of having the pull tab on the right.


Well, hope you like my project!  I'm having so much fun making mini albums!  I have more to come- just need to get photos taken and then I can share.  Later alligator!