Saturday, February 2, 2013

2/2/13: Asakusa, Harajuku, and Tokyo Station

Ohayogozaimasu!  It's about 6:00am here in Tokyo and we heard about the earthquake in Hokkaido.  Now everyone is saying we are the cause. We aren't even there yet!  Keeping my fingers crossed on that.

We started yesterday off early since we were still half on Hawaii time, half jet lagged.  Paul took Akemi  exploring in Asakusa in the morning before everything opened, so they got a nice shot of Kaminarimon.  I think its pretty awesome that a lantern has it's own name!  Paul says it is a big gate dedicated to the god of thunder.  I think they went geocashing but came back empty handed.  Junk!


After they came back from their walk we had the awesome hotel breakfast!  I wasn't sure if Akemi would like it, but she pounded 5 pieces of toast and 4 bowls of miso soup!  OMG... I guess she's growing again. I took a photo w/my instax but not with my phone, so I will try to get a new shot today.

Then we headed out on our first adventure.  Since Paul had a taiko lesson at noon, he dropped us off in Harajuku.  On our way to the train station, we found the Ban Dai headquarters again.  Akemi wanted to take photos with all of the statues in the front.  This guy is the mascot for Tamagochi.


I liked this one too of Paul, Akemi and Ultra Man.  It looks like the one he took last time but now Akemi is added.


And Akemi is doing Gangnam Style with Kamen Rider!


First stop in Harajuku was Kiddy Land!!!!  Woo Hoo!  The last time we came, they were in the temporary store since this one was being renovated.  It's so much better now!  There was 6 floors of toys and kawaii heaven!!  I think Akemi and I spent over 2 hours in there...


Here's Akemi's favorite floor....  Its in the basement...


I thought these socks were awesome...


And Akemi found a new passion... Gashapon!  She loves the vending machines back home, but those are so junk compared to these!  In Snoopy town, we found these in the back.  We bought so much stuff, I might do a haul post to show you all the goods.  After she found the gashapon machines she was on a mission to get one on every floor and wherever we saw them in Harajuku.


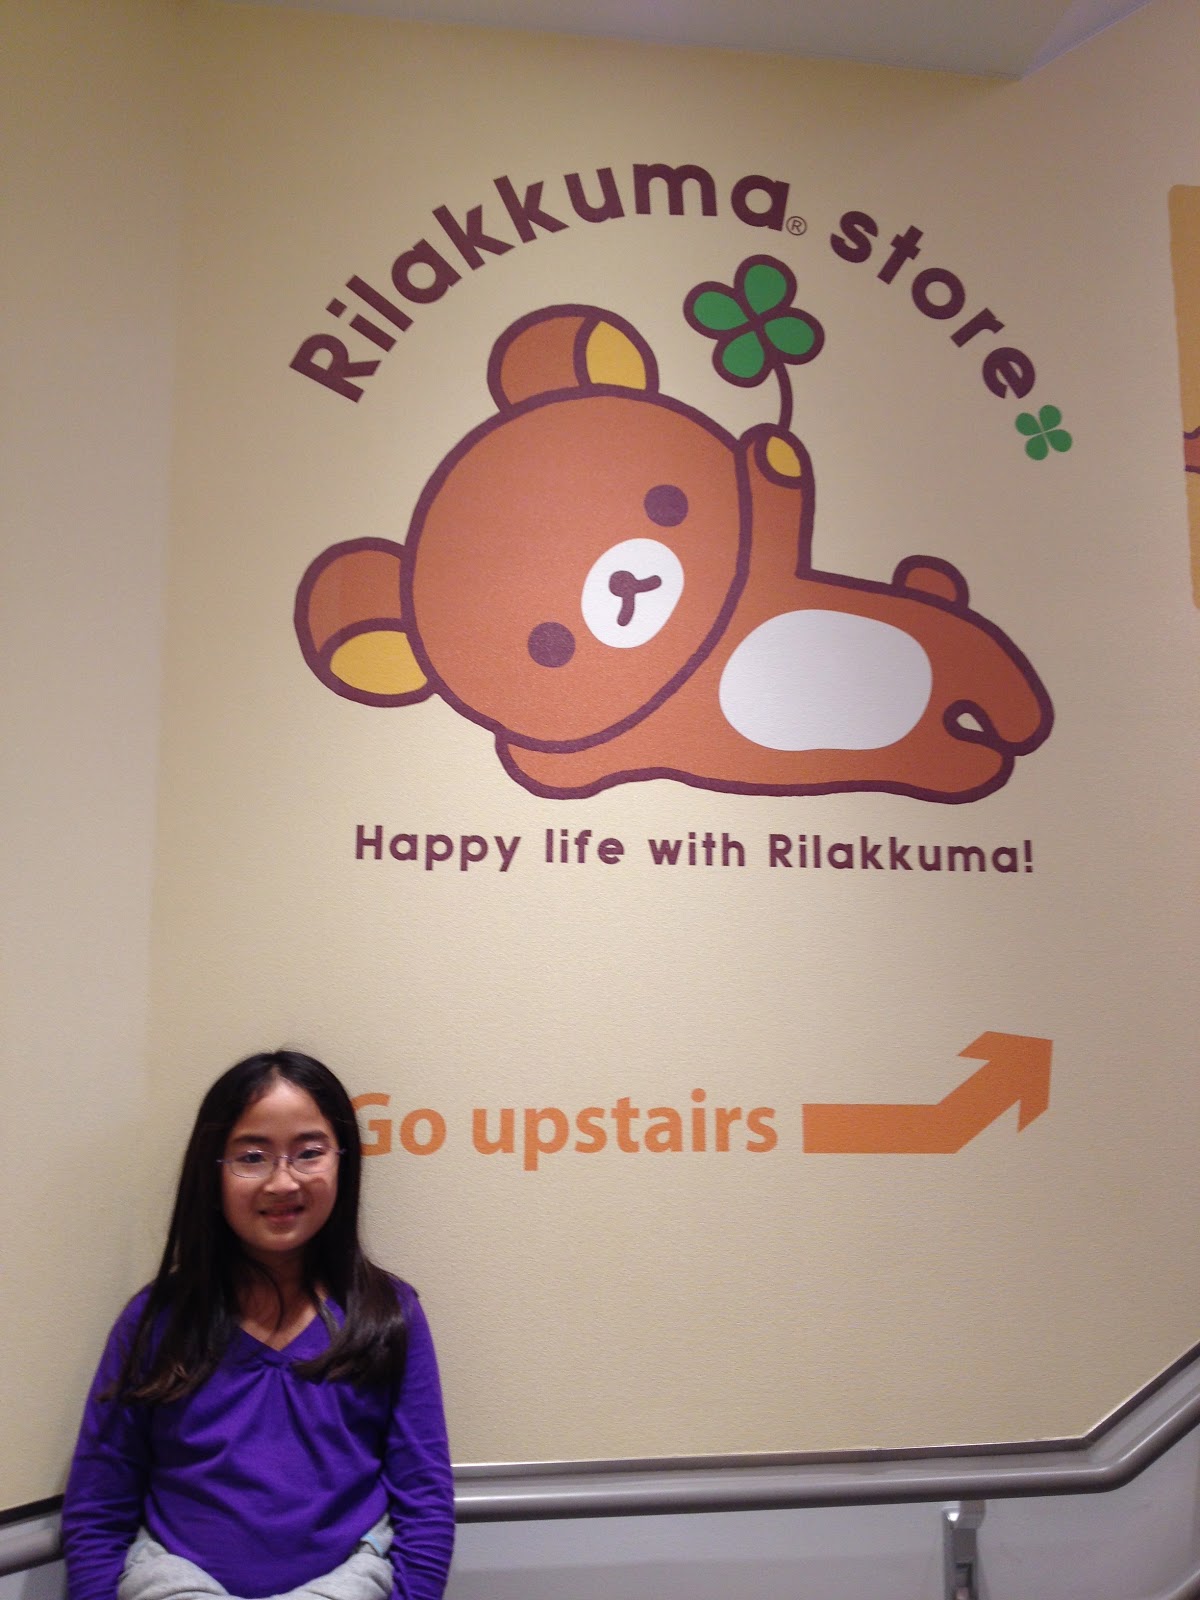
Aaaaahhhh, Rilakkuma.... Linda's favorite bear.  There was 1/2 a floor dedicated to him in Kiddy Land.  Linda would've been in heaven.  Don't worry girl, I got your b-day present (and then some) from here...

After Kiddy Land, we were tired but I still wanted to go to Oriental Bazaar, so I dragged Akemi there and forced her to go shopping with me.  She complained a lot in there, but I managed to get a few items  from the first floor.  Didn't get to go to any other floor there though...


OK don't judge me.. but YES, we did end up eating at Shakey's Pizza.  Funny yah? We have all of the best Japanese cuisine and we end up eating here.  I gave in since Akemi was tired and I thought this might make her happy- we still had more shopping to do at the 100 yen store.


We both got the buffet which included salad bar, curry, pizza, pasta and fried potato.  Their fried potato reminded me of those huge steak fries back at Marriott at UH.  They weren't that good.  We also had pizza, which was good and pasta. I can't vouche for the pasta since Akemi ate all of mine.  When she went back for more, they changed it up, so I had the mushroom one and it was good.  Their pizza was interesting.  The "white" pizza on my plate was sausage and pepper, but the weird thing was that it had a mayo like sauce.  It was good, but I think you won't like it if you don't eat mayo.

The other pizza on the right is a chocolate marshmallow pizza.  I got that for Akemi and she liked it.  She even got a 2nd piece.  She also had some jello from the salad bar, which she ate but I didn't get much feedback on.  I thought the best thing was the curry. 


After lunch we headed for Takeshita Street for more shopping.  I am pretty amazed that I remembered how to get there from Kiddy Land.  We  found the Tamagochi store and Akemi got more gashapon.  I got some cool flat umbrellas for 525 yen.   Then we hit Daiso or 100 yen shop!  Found a lot of omiyage there, but someone was getting cranky, so we cut the trip short to try to find somewhere to sit.


 After taking a short break, we went back to the Tamagochi store to get more gashapon for Akemi's friends.  Then headed back to meet Paul who was running late from his lesson.  I noticed some weird activity in that area, so I made sure Akemi held on tight to me.  No one bothered us though... I noticed guys who were standing on the sides of the street were targeting Japanese men... they would hold there hand and pull them to the side and show them something.  Paul thinks it was a store or maybe strip club?  Whatever it was, I didn't want to stick around that area.

After we met Paul back at the Daiso, we decided to get a snack...   Harajuku Creeps baby!  Bwahahahaha!  The reason I call it that is because my iPhone kept autocorrecting crepes to be creeps!   They were yummy.  I liked the ones with the ice cream better.


After we said goodbye to Harajuku, we headed for Tokyo Station where I read on the Asking for Trouble blog about Character Street.  What?  I've never heard of this before, but I was intrigued.... We got lost and had to ask for directions and even consult the internet, but we eventually found it.  There's a small "street" full of character shops.  We found a Totoro shop, Rilakkuma, Hello Kitty, Ultra Man, NHK, Miffy, and many more that I've never heard of.  Paul thought this was cute at the Totoro shop.  I got some stuff for my sis who's a huge Totoro fan.


I don't know who this is or what his name is, but doesn't he look like someone?


After Character shops, we were exhausted and hungry.  We roamed the station for a place to eat since we heard many of the shops are good.  We found one where we could sit down and have some udon.  I guess the beer was calling me, so we had some Asahi with our meal.


The waitress brought us the burner, chopsticks and spoons, so we figured out we were cooking our own!  It was good but kinda spicy.  And I mean stealth spicy.  Akemi and I didn't even notice until about 1/2 way through the meal.  Akemi couldn't even finish it, so Paul scored.  I was quite delish I must say...


I gotta say, Tokyo station is pretty neat for a station.  It's SUPER DUPER crowded though, but you can get some cool stuff including omiyage!  How convenient!  Remember this post from last time?  Well, we found the same cake at the Tokyo station!  I was in heaven!!!


After dinner, we got some cake.  I let Akemi choose and she chose this one.. It comes all packed nicely but we opened it up to eat as dessert.  She chose the sakura one, which I wanted to try last time.  Inside the package, there was a brochure.  This cake is called Baumkuchen, and their slogan is "We made this baumkuchen with all our hearts."  So cute!  Love that!  And then the taste... mmmmmmm.... so good.  Not too sweet but there's a layer of chunky sugar around the edge.  I'm in heaven.  This was a must do on our trip to Ginza, but now I know I can also get it from Tokyo Station!!!


Wow, that was a really long post.. took me almost an hour!  We are heading to Nakamise Dori today, so we're hoping to hit Mr. Donut, age manju, fresh arare, and the washi paper store!  See ya tomorrow!

Friday, February 1, 2013

Japan 2013 Trip Report: 1/31/13 Travel Day!

We made it to Asakusa last night after a LOOOOOONNNGGGG travel day.  Our day began with some last minute errands in the morning before heading to the Hilo Airport.  Before we left, Paul took a picture of our doggie... Kiki looked so sad when she realized we were leaving!  Bye Kiki!  Be good for Grandma!


Here we are waiting at the Hilo Airport.  Can you see Akemi photo-bombing us?


Hooray!  We finally make it on the plane to Honolulu....  Can you see how excited we are?


After arriving in Honolulu, we ate and then headed for the Premier Club Lounge... Thank you Grandma Helen!  Unfortunately, Akemi has a lot of homework to do, so we made her do some on our layover.  She kept saying, "I have to keep pinching myself to make sure I'm not dreaming!"  So cute yah?


I guess my husband's photo skills are still alive and well.. I like this photo of his passport and boarding pass.  I think I need to snake it for my scrapbook...


Before heading to the plane, we decided to stop off and get some Pinkberry!  Yum!  Paul and I shared a coconut with the melted chocolate crunch balls and fresh bananas on it.  Hey.. where did it all go? :)


I guess that was the "after" photo.  Here's one of the before... Akemi had chocolate yogurt with that melted chocolate crunch, blueberries, brownie bites, and strawberries,  I gave Paul a $20 and he gave me back $4.  What???  I guess buying two of these cost more than 2 plate lunches....


See the melty goodness on the top?  I guess that was worth an extra $1.40.  When I went back to look at my old Pinkberry post, it said that I only paid $1 more.  Talk about inflation!


I guess Paul was happy to see our plane waiting for us...  Hello Plane!


Let's get this show on the road!!!  Here's a view from my seat....


And me and Akemi happy to be airborne...


They fed us pretty quickly after we took off.  When they first passed around the card with the drink and food info, we were a little worried as the meal was listed as pork and peas.  I was concerned that Akemi would not eat anything if that was the meal.  I thought that was a weird choice considering we were flying to Japan and not the Philippines.  Luckily, they served us grilled chicken with rice and edamame, caesar salad and what I think was a cheesecake.  I thought everything was ok, but Akemi was happy. I guess she was also worried it would be pork and peas!


See how relieved she looks?


And about 2 hours before we landed, we got a snack... It's so cute wrapped up in the furoshiki!  I was dehydrated, so I asked for 2 drinks.  Inside our snack box was a chicken sandwich (literally a slice of chicken with mayo- kinda like a chicken salad sandwhich?), Hawaiian Host chocolate and macadamia cookies.  Akemi didn't eat her's so Paul packed it and ate it when we got to the hotel.


Akemi had a hard time sleeping on the plane, but did manage to get a few hours in.  By the time we got off the plane she was exhausted but hung in there... we still had to go through immigration, customs, get on the monorail and then the subway!  Apparently they took this photo while I used the bathroom in the airport.


We finally made it!  Here we are on Akemi's first monorail and subway ride.  I think Paul suffered the most as Akemi had a hard time handling her suitcase.  He ended up carrying both his and her suitcase down several flights of stairs and all throughout the subway system.  Thank goodness I convinced him that we should look for an elevator to get up to street level once we hit our stop.  Success!  We found it!  Thank god cause I sure didn't want to carry my suitcase up all those stairs!  I had visions from last time and I was gonna do my best to not have to do that again!


 Paul said he felt like we were home after we got onto the main street leading to our hotel.  I was happy to see the Lawson store right next to the station and pleasantly surprised to see a 7-11 literally downstairs from our hotel!  After we got to our room we discovered our hotel had some changes too... We now have wireless in the room!  Yay!  Last time it was a wired connection, so now all of our gadgets can work.  Woo hoo! AND they no longer have regular keys.  They now have the card keys that most hotels had.  Thank goodness. I used to stress out about forgetting the key.  Yay!  So happy to be back.

Since we are a bit messed up, we woke up just before 5am Tokyo time.  Akemi said she'd been up for awhile, so I made her do some homework.  What a junk mom yah?  I think she had cabin fever, so after she finished one assignment she asked Paul if she could go walking with him.  Now I'm just waiting for them to come back so we can go have their awesome free breakfast!!

I think we are heading to Harajuku and (crossing my fingers) Character Street today.  Paul has a taiko lesson so he's going to drop us off at Harajuku while I take Akemi to Kiddyland, Oriental Bazaar, and then we'll meet him back at the 100 yen shop.


Thursday, January 31, 2013

Japan Adventure

Before we head out on our next Japan Adventure, I thought I'd share some interesting trip planning sites that I found useful...

First off, I just found this cool site by Marceline Smith. She posts about Japan and all things Kawaii!  Bonus links on this site for shopping in Japan- including craft stores.  She even has a zine (Tokyo shopping guide) you can purchase through amazon.com.  Thanks Marceline!
http://blog.askingfortrouble.org/tokyo-shopping-guide/

Another good resource is the Japan-guide.com.  They have so much information about Japan and you can search by almost anything...
http://www.japan-guide.com/

If you are winging it on your own.. you will also want to get this subway route map for the Tokyo area.
http://www.livingasian.com/2007/07/japan-tokyo-subway-and-train-lines-with-maps/.  We also found an app for it in the app store.

Other trip planning recommendations:
When it comes to food, I don't think we had one bad meal, so don't worry about it! I can't even tell you where we ate on our last trip except that the food was good at each stop.

Also, no one tips in Japan, so we bring extra omiyage to give out to hotel staff and others that help us out along the way.  Everyone is so happy when we give them mac nuts or other goodies.

We also recommend turning on your data plan for international use.  Last time we didn't do that, but we did this time around.  I think it will be much easier for us to get around and communicate with each other.

Oki doki... we are off so see you in Japan!

Saturday, January 26, 2013

Best Friends

 My daughter has had her best friend since pre-school.  I wanted to do something nice for her, so I decided to try making a layout using a photo from their first play date.   You can't tell from the photo, but they are both sitting inside a batmobile car near the shave ice shop.  I don't think they could both fit in it now!


I really wanted to use my new Prima stencil on this layout, so I started with the Firefly background paper (one of my favorites!) and used my Dreamweaver paste with the stencil.  After pasting, I used some glitter on the paste while it was still wet.  Here's a better look...


For the frame, I used a Sizzix thinlet die and cut it out of watercolor paper.  Then I sprayed it with my Lindy's stamp gang spray.  I know you can't tell from the photo but it has a pearly shimmer to it.


Then it was time to embellish!  So I found all my purple, pink and white flowers and went to town gluing them onto the layout.  Most of them are by Petaloo with a few by Prima, Wild Orchid Crafts, and All Natural Accents.  Forgot to mention that I added in some Zva rhinestone flourishs under the flowers.

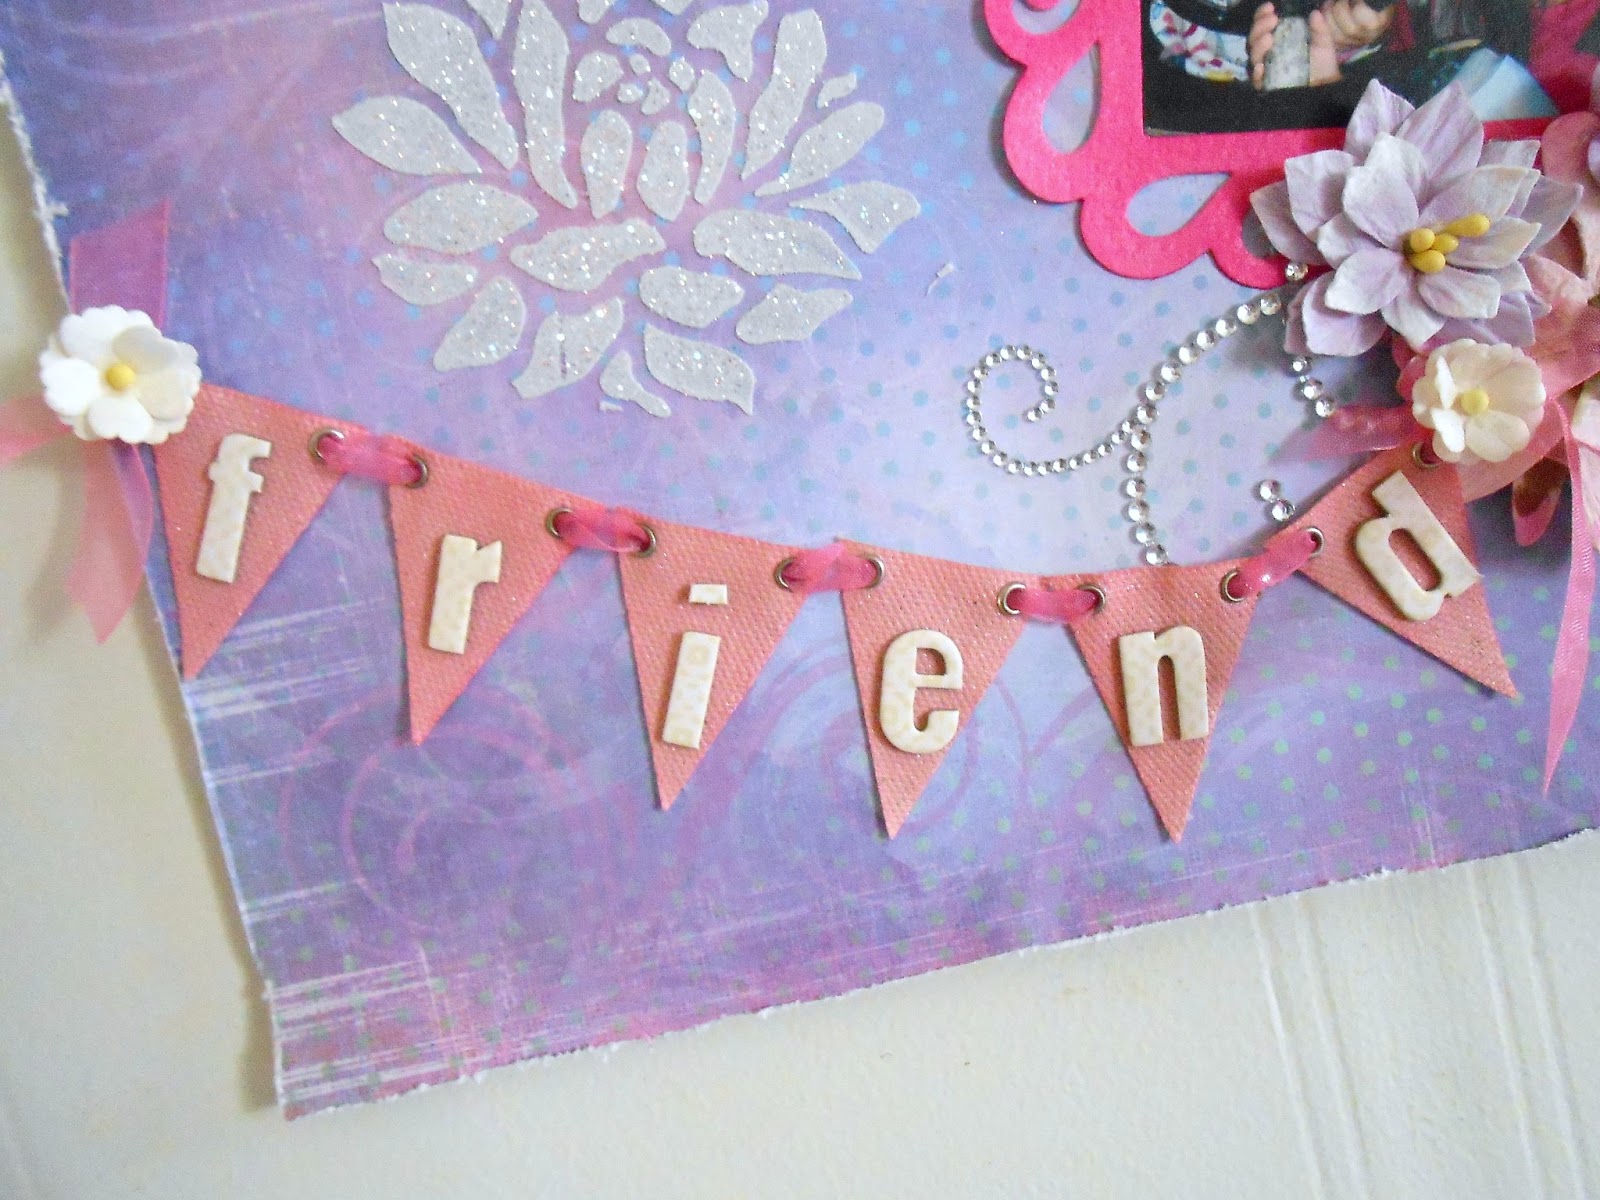
Here's the best part!  I got the canvas pennants by Prima recently and wanted to use it on my layout.  I decided to spray them as well to get the color I wanted, then strung them onto some sheer ribbon.  After figuring out where I wanted it to go, I glued them down to the layout and added some white flowers.  Found some chipboard letters and used them to spell out best friends.


Here's the rest of the title.


I have a feeling I will need to make another one soon.  She is now besties with her BFF's sister, so I know they'll be asking for another layout with all three of them!

Thursday, January 24, 2013

Clip Board Frame

I like to try out new ideas from time to time.  I found these blank recycled mini clipboards for $1, so I decided to do a bit of altering.  First I painted it with Gesso... do I sound like I know what I'm talking about?  Well, it's all an act.  Truthfully, I have no idea if its better to use Gesso or regular white acrylic paint.  Maybe I'll never know.

After giving it a coat of Gesso, I decided to add some of my treasured Prima DP from the Fairybelle collection.  You  can't see it too good cause I got Akemi's photo over it, but its really pretty!  I adhered it using mod podge instead of just regular adhesive.

Then I started embellishing.  First I chose the large white Prima flower to cover the clip part of the board.  Next to it, I added in some Prima aqua roses w/white tips.  Love those for a shabby look. Then I made another wire heart and added some bling and more roses.    Then I cut a pink mat and clipped the photo over it.  I think I like the fact that you can change out the photo if you like.  Plus, since it's also a clip board, you can easily hang it on the wall!


I've been on you tube a lot recently and found so many amazing projects!  I can't share some of them yet since they are gifts to some special friends...

Oh, and please check out the Sister Stamps blog for our Release #11 Sneak Peeks!  Hope you like them!

And for those of you who followed my Japan adventure a couple of years ago.. we are going again!  This time we are heading to the Snow Festival in Sapporo, so we'll likely freeze our buns off.  I'm hoping to keep a blog diary again of our trip, so you might want to check back if you want to see what we are up to on our next Japan Adventure!

Friday, January 18, 2013

Puppy Love

This is my dog Kiki.  She is our 11 year old daschund, but this photo is when she was just a puppy. While cleaning out my craft room, I stumbled upon some old photos of my baby.  She is also known as my first daughter.  Little did we know that she is an alpha dog, so it took YEARS to train her that she was not the leader.

Now that Kiki is old, she is more mellow and easier to handle, but I do miss those puppy days when she was so cute!  


So I've been very interested in the art journal/steampunk look for a few weeks now.  I saw someone post an art journal cover from a class they took from Anna Dabrowska.  I gotta say, once I saw how cool her stuff is, I was hooked and became obsessed with finding more and more samples of mixed media art.  If you have time, check out all her projects.  She is also a designer for Prima and Prima will soon carry her line of products! Can't wait!

OK back to the project.  So I started by applying gesso to some watercolor paper.  Then I applied paste (Dreamweaver) to the brick mask (Crafter's Workshop) in two corners of the paper.  This photo shows it pretty good.


After that I cut out a clock from a Tim Holtz die out of acetate and applied white alcohol ink (Ranger) to the clock.  I didn't want the clock to stand out too much, but I did want people to see it, which I why I opted for acetate.  I was hoping that the white alcohol ink would then allow the sprays to color it up.

Then I adhered Kiki's picture and distressed mat piece behind it.  Then I began gluing on flowers and metal trinkets (Tim Holtz) around two corners of the photo and painted them with gesso. Then I covered the photo and started spraying with green, teal gold and brown sprays by Lindy's Stamp Gang.  I used all of the ones with shimmer inside since I wanted the metallic look.  I don't know if it was the gesso or something else I did but I don't think I should've done that.  My friend Tracy told me that she thinks it was the gesso and suggested I use gel medium.  I guess I gotta put that on my list of things to try next time.  I ended up using a lot of spray but the white kept showing through.  Anyone know if the gesso was the mistake or if I did something else wrong?


After I gave up on the spraying, I completely dried the paper and then added my Puppy Love title using black foam thickers.  Since my watercolor paper was not a full 12x12 size, I distressed the edges, and then adhered it to a kraft cardstock and distressed those edges too.  Then I mounted it on a 12x12 chipboard.  I've found that if I don't do that, the corners end up curling.


So I'm open to suggestions.. if you have any recommendations on what I should do to not have so much white resisting, let me know.  I guess I'll have to wait until I get me some gel medium before I attempt this again...

I just realized I'm posting this on Friday... Yay!  We made it to the end of the week! Ready for the long weekend?

Thursday, January 17, 2013

Sweet Baby

First of all, I must apologize for the bad photos.  I had a hard time for some reason.  

Anyway, still on my shabby chic kick... found this old photo of Akemi and wanted to use the turquoise colors in her dress as the color theme for the layout.  Dug up one of the Firefly papers by Prima as the background sheet and really wanted to try the zipper technique in this layout.  At first I thought the purple/pink rose background on the other side would work since her haku lei is purple, but after studying it awhile, I decided to paint over it so that the layout was mostly white and turquoise.


I started by using my new Prima flower mask and adding some paste for dimension.  Did this in the corner and where I wanted the picture to go.  The paste is supposed to take about 1 hr to dry, but I used my heat gun to speed up the process.  Yes, I'm impatient.


Then I cut a mat for the photo and distressed the edges.  Staggered it behind the photo for interest and then adhered it down to the paper.  Then I cut a line up from the bottom of the paper to about where I wanted the zipper to show.  I then trimmed out a triangle and distressed/curled up the edges.  This is where I inserted the zipper- adhered it behind the page.  To fill the hole, I adhered some rosette trim to a paper and adhered it to the back of the zippered area.  At first I wanted to put my sentiment inside the zipper, but it ended up being too small an area, so I scrapped that idea and just added in some heart embellishments I made (see previous post for link to tutorial).  Added an acrylic flower to accent the heart.
.

Now came the fun part!  Embellishing!  I went through my stash and picked out some pearl flouishes, flowers by I Am Roses and Wild Orchid Crafts, acrylic flowers and a feather butterfly.


Then I added the sentiment using white foam thickers.  Couldn't decide on the title so I went with Sweet Baby.


Ok thanks for bearing through these awful photos!  I have something more punky to share tomrrow!

Tuesday, January 15, 2013

That's Amore

I guess I was bit inspired by Valentine's day in this layout.  My real mission was to finally use my Lindy's Stamp Gang sprays!  So promise me you won't laugh.. This is my first layout using the sprays and I had some issues, but the end result was something I could live with, so that's why I'm sharing it with you now.

I stared with a plain white cardstock paper.  That is where I made my mistake.  I think I should've used watercolor paper since spraying can really warp the paper.  Oh well, live and learn.


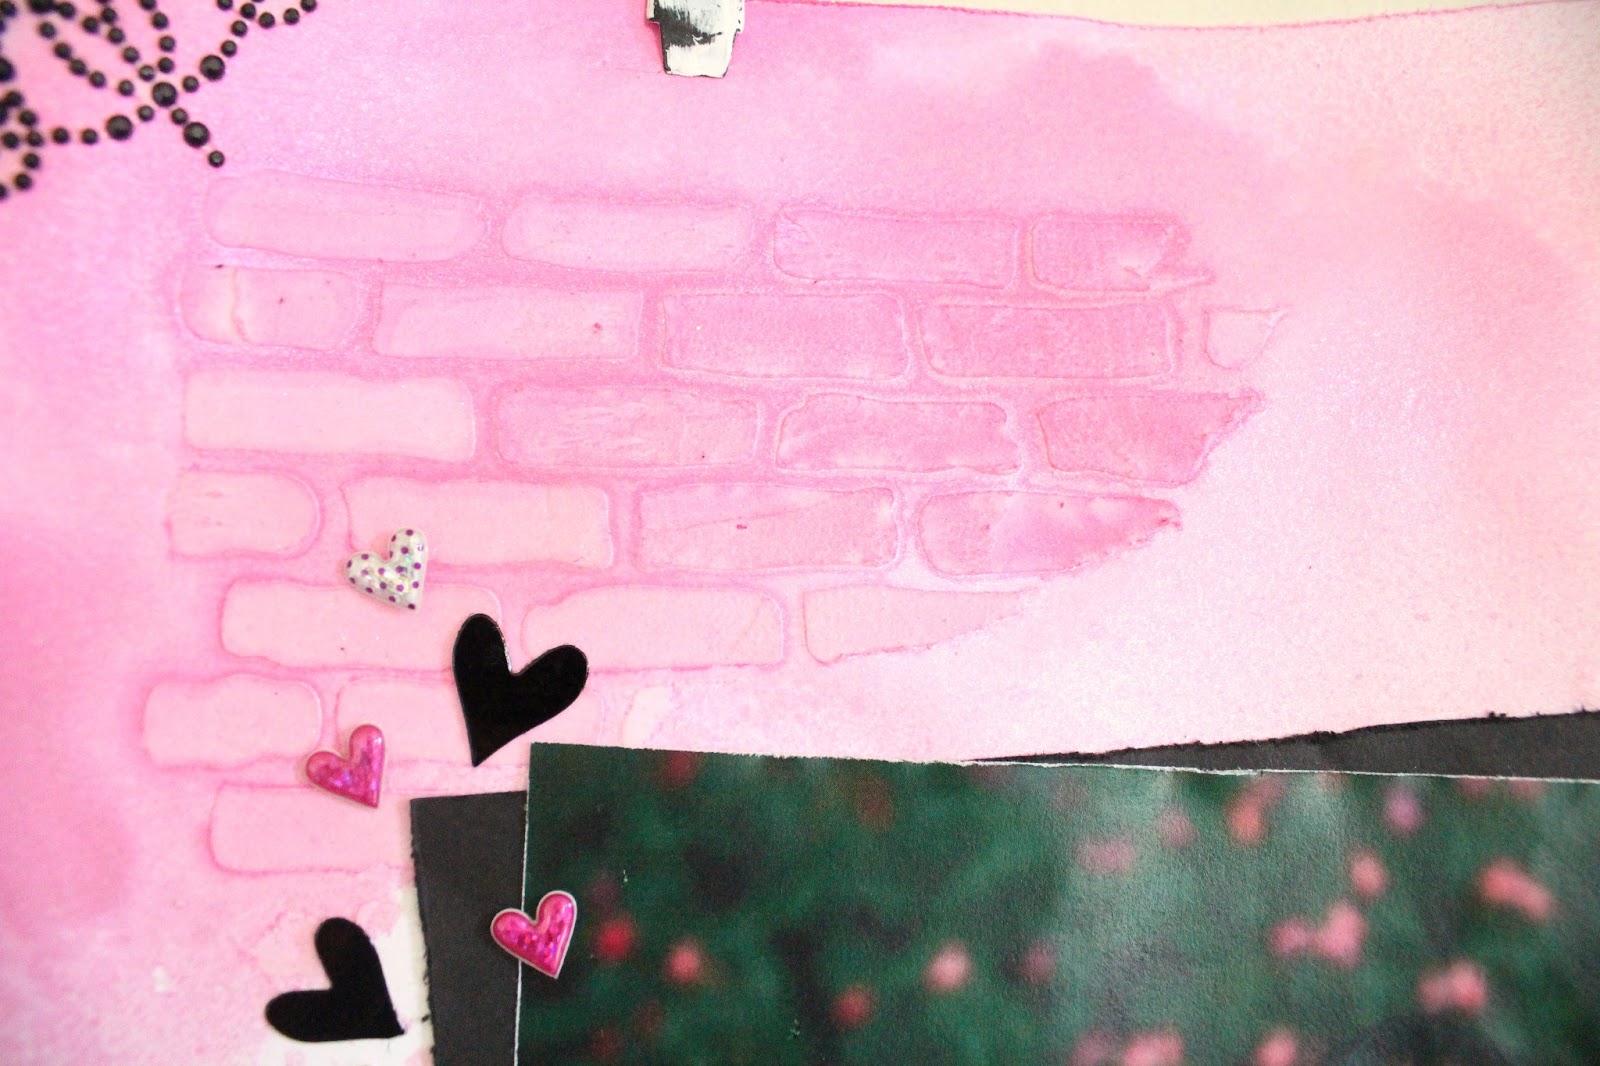
So the first thing I did was distress the edges.  Then I attempted to use some new stencils and paste I got recently.  I feel rather dum because I think I just tossed out an old bottle of Dreamweaver paste, having vowed I would never paste again, but here I am now using it.  What a waste yah?  Back to the layout... I thought the brick stencil would be fun, so I pasted it in two corners of the layout.  Here's what it looked like after I sprayed them with my Lindy's.  It's hard to tell, but the shimmer sprays come out very pearly- love it!  I think I used bubble gum and cotton candy.


So I decided to go with a Parisian color scheme of pink, black and white... one of my favorite color combos!  Loved this pic by my friend Les (thanks Les!) that she took of Akemi when she came to visit us a couple years ago. Instead of matting the photo like you normally would, I decided to make it off centered for interest.

And what would a Parisian layout be without an Eiffel Tower?  I love this die by La La Land Crafts! At first I thought it was a bit big, but it is actually perfect for layouts!  I love the detail too.  I also used the Twirled Heart Border die by Memory Box. Just love how thin it cuts!


The heart was made using some wire, small flowers and some stickles.  Here's a video by Juliana of I Luv Vintage Scrap that I followed to make my own.  I also used a flourish by Recollections next to the heart along with flowers by Prima.  Since the theme was Parisian, I opted for an "amore" title using some black foam thickers  The black hearts you see are what was cut out from the border die.  Added in some puffy heart stickers from my stash and Prima corner crystals in black.


I'm still learning how to use the sprays.  Hopefully next time I use them I'll get better results!


Monday, January 14, 2013

Sweetie

Ok, so I haven't exactly kept up on scrapbooking my daughter's life.  I guess I got a little bored with it and it just never happened.  Now that I've discovered shabby chic/vintage layouts, I'm in love again with scrapbooking... or maybe it is more wall art?

After the craft fair, holidays, and cleaning up my office, I was finally able to sit down and make my first shabby chic layout.  I had seen quite a few layouts using the torn technique below and I wanted to incorporate it somehow into my layout.  Here's what I came up with...


Before we start on the actual layout.. I just want to point out the hanger!  I just love this hanger by Melissa Francis!!  Found this treasure while at Paper Tales in San Diego...  If you live in San Diego or near that area, you should definitely check out Michelle's store!  (Hi Michelle!)  I need to find my photos of that store and post them.  She has some beautifully shabby products that I snapped up and am so glad I did.  This hanger was one of them!

OK on to the layout...  This is one of my favorite photos of my daughter.  My friend Les took them for us when Akemi turned 1.  I took the photo and turned it into black and white since I thought it would give a better vintage feel.  The paper used is one of the Tea Thyme papers by Prima, which I ordered by Hopscotch Crafts.  Drew has some hard to find products that I just love!  Go check out his site for more Prima goodness..


I stared by distressing all edges of the paper in the back and on top.  Then I added some Distress ink in Tattered Rose and Vintage Photo.  I love this look- it really makes the image pop when the edges are darker.

To get the torn page effect, I used a craft knife and cut a + about where I wanted the photo.  Then I distressed and curled the edges back.  Since the top paper was cropped down a little smaller than the back sheet, I had to figure out where to adhere the photo so that it showed through the window.  After finding the right position, I adhered it down and then adhered the top paper over it, which allows the picture to show through the hole.


Then it was time to decorate! First I decided to use some lace I had stashed.  I really can't remember where I got it from. I have a feeling it was at Walmart, but not certain.  Anyway, it was originally white, but the white color didn't match the layout.  I really wanted to use that lace, so I decided to add some color myself.  I ended up opting for some Lindy's Stamp Gang sprays in sand and then drying it with my heat tool before gluing down.  Then I added some pearl teardrop trim over the lace and added a variety of vintage colored flowers in pink, white, ivory and brown.  Flowers and leaves were from I am Roses, Prima, and Wild Orchid Crafts.


Finally, my page needed a title, so I decided on my pet name for Akemi.. Sweetie.  Used some white foam thickers I had in my stash and colored them using some vintage photo distress ink to match.

I have another layout to share with you soon.  Thank for stopping by!