Thursday, September 30, 2010

Embossed Acetate Snowflake

Ta Da!!!! Michele at Island Scrapbooking told me never to heat acetate. Then I stumbled on a youtube video that shows you how to do emboss on acetate! I just had to try it and what do you know- it worked! Guess I lucked out and tried it out on some thicker acetate that I had. I love the look and dimension it gave this card. Sorry- I know its hard to see because the acetate reflects everything, so hopefully this next photo will help you to see it better. I added crystals to accent the rest of the card. Darn- forgot to show you the inside! When you open the acetate flap, it will then allow you to open the red card inside to reveal the sentiment. All I can say is that these photos don't make the card look too nice. Hopefully you can stop by the store and see them in person! Supplies:
  • Snowflake stamps- Hero Arts
  • Crystals- Kaisercrafts
  • Queens gold embossing powder
  • Ribbon
  • Acetate
  • Cardstock- Bazzil

Wednesday, September 29, 2010

Challenge Time!

What can I say?! I've been inspired by all those challenges out there lately... this card came together without that much effort and seems to qualify for a few challenges! Here's the challenges I'm entering: How exciting! I've never entered the Flutterby Wednesday challenge before so this is really rare for me to have 3 for the price of one! So Tamiko's Creative Team is challenging everyone to alter an Anya. Normally I would do the head switcharoo, but I decided to be brave and try opening up the eyes. Let me explain a little about my altered Anya. I've been wanting to try this for AGES! Ever since I saw Amy (A thousand Sheets of Paper) do a tutorial on this I've been dying to try. Once you have all the right tools, its not that hard. I finally got my new light box (little problems with the batteries, but now works fine) and new Copic Multiliner pen so I was able to try this out. It was fun choosing which images to combine together. Can you guess which two images I used? Well, I think the Angel Anya is a dead giveaway, but I also used Fleur Anya's eyes. I guess you can't tell since their eyes are pretty much the same. I'm sure you'll be seeing more of this technique again soon. Next, I've been playing around with acetate cards, so I wanted to practice a bit more and added Angel Anya to acetate instead of regular cardstock. I think this qualifies for the All that Scraps Challenge this week. Believe me- acetate cards are pretty challenging! Finally, I normally use bling on my cards, plus I used Angel Anya, so she qualifies me for Flutterby Wednesday! Not sure if you can tell, but she has stickles on her wings. Also added pearl bling and glittered sakura's as accents. Here's a close up of Angel Anya. I like her with her eyes open! I feel like a proud mama! Supplies:
  • Angel Anya- TGF
  • Sakura- Island Scrapbooking
  • Pearl Bling- Kaisercrafts
  • Sweet Wonderful You sentiment- Hero Arts
  • Labels dies- Spellbinders
  • DP- Best Creations
  • Stickles

Love/Hate Relationship With Acetate

I'll admit it... I love the look of acetate cards! But on the other hand, there's so many challenges that come with see thru stuff. Like hiding the adhesive, knowing what will stamp on acetate, what to layer on the acetate and what to keep behind it, how to photograph it!, etc... So I'm planning on teaching a class using acetate so that I can teach others what not to do when working with acetate! Ha! OK- so this is one of the cards we will be making. Truthfully, I really struggled with this one- not sure why since its just plain stamping. Guess I had some difficulty pairing the colors of the DP- which I ended up changing to the backside anyway! Oh well- I like the end product. Also decided to do some embossing onto colored cardstock for a different look and less fuss for my students. My students have told me many times that they don't like coloring.... in class anyway. I guess its cause it takes much longer to color an image than to just stamp and cut it out... So I try to consider the feedback they give me and not do so much coloring. This new Hero Arts stamp set really helped since it had a lot of detail but did not have to be colored in- stamping on colored paper seemed to do the trick. As you can see from the first photo, I stamped Merry Christmas on the acetate- that's it. Nothing else was done on the acetate. Here's the card when its opened- you can see the Merry Christmas is missing. Here's a close up of those trees. I'll post the other two cards soon. Supplies:
  • All stamps- Hero Arts
  • DP- Basic Gray
  • Labels Dies- Spellbinders
  • Cardstock- Bazzil
  • Queen's Gold Embossing Powder
  • Acetate

Tuesday, September 28, 2010

Winking Reindeer

Happy Tuesday! Hope you had a great weekend. Mine was spent sleeping, napping, and a little bit of crafting.. Not much though. My body had other plans for me and needed to catch up on much needed sleep. So I finally feel a little better and created a few things last night. This is one of the quick cards I made. I fell in love with this reindeer as soon as I saw it in the new Hero Arts Holiday catalog! Since I got it, I haven't used it, so I decided this was the time to bust it out. I also was dying to use my new music sheet background cling. I've been searching high and low for a background stamp like this since I got into distressing. Hero Arts must've read my mind cause it jumped out at me while looking at the catalog. How perfect is that? To get the musical notes gold, I used my versamark ink then brushed on some gold mica powder for the musical notes. I love the look on colored cardstock. So since its pratically impossible to cut out those antlers, I stamped the reindeer on the card then again on some white paper and colored her in and cut her out. Then mounted her over the original stamped image on the card so that you could still see her antlers! :) Finished it off with some bling and a sentiment, and then I was done! This was a very quick card but I love it! Supplies:
  • Winking Reindeer, sentiment and music background- Hero Arts
  • Cardstock- Bazzil
  • Bling- Kaisercraft
  • Gold Mica Powder

Sunday, September 26, 2010

September Tags Swap + Happy Mail!

I'm totally speechless! My Tag Swap Partner for September was Cami. I'm loving this swap! You make 3 tags and swap them with your partner... Click here to see the tags I made for Cami... I was so excited to be Cami's partner this month since I had met her at the Islander Girls Social 2. She's so much fun and so creative! I just love her projects she posts and knew she would send me something special... but when I saw these tags I was floored- they are really cute- especially in person! I've been eyeing these Penny Black girls since I saw them at Cute Stuff. Can't wait to get my hands on them! Here's a close up of one of them. I'm sorry, but I don't know if I can use them this year! I'll definitely have to save one of them for my collection.. She even decorated the inside! And she sent me goodies too! Thank you so much Cami! You are so sweet! If you want to sign up for the October Tag Swap, visit Kyoko's blog here to sign up now!! Maybe you'll be partnered with me next month!

Saturday, September 25, 2010

Party Pup

Who can resist this cutie? I obviously couldn't. There are two more doggies like this one, but I think I like him the best (for now until I decide I can't live without his other two buddies). I decided to make an easel card again. Here's what it looks like when its open. Here's a close up of the sentiment. I wanted to use my modern label punch but needed a small sentiment to fit. This small Seasons Greetings is by CC's. Never thought I'd use it since its so small, but it fit perfectly! Accented it with my pine branch MS Punch. Supplies:
  • Party Pup- LOTV
  • Modern label and word window punch- SU
  • Scallop square die- Spellbinders
  • Season's Greetings- CC's Designs
  • Pine branch punch- MS crafts
  • Red foil cardstock- American Crafts
  • Silver cardstock- Bazzil
  • DP- Imaginisce

Friday, September 24, 2010

September Tag Swap

My GF Kyoko is hosting a Christmas Tag Swap every month.. go check out her blog for the swap announcement if you want to participate next month. I really like this swap since you can swap 3 tags with someone else and should have enough by Christmas time!! Yay! This month I was soooo excited and nervous to be paired up with Cami.. She does such beautiful work that its a little intimidating to be paired up with her. I met Cami at the Islander Girl's Social in August and she's so much fun- I'm so glad we were sitting on the same table! So, here's the tags I'm sending to Cami.. Hope she likes it. I used one of my new LOTV images again for the tags. These images are good sized, so it was difficult to choose one that would fit on a tag. As you can see, they don't fit, so I had to have the angel hang off the tag so that there would be enough room for the "to/from". Again I decided not to make them identical since I get bored easily, so I changed up the colors a bit to give Cami some options. This time I was akamai (smart) and made 6 tags- 3 for me and 3 for Cami! Yay! Now I have some for me too. I should have done that last month too but didn't think about it till afterwards. I think I'm gonna go back and make a set of those for me too. Hope you like it Cami! Here's close ups of each tag.... Supplies:
  • Angel stamp- LOTV
  • To/From: Hero Arts
  • DP: Doodlebug,
  • Labels dies: Spellbinders
  • Stickles

Thursday, September 23, 2010

September OCS- Summer Card

Here's the card I made for this month's OCS hosted by my GF Linda.. Its a great way to meet other crafters and exchange ideas! October sign ups should be announced soon, so if you are interested, check out her blog for the announcement. So, Linda has been challenging us for each OCS since she's taken over from Teri... This month's theme it to create a summer card. Since I've made a few summer themed cards this year, I decided to find an image that I haven't used recently. While browsing through my stash, I found this Mermaid Lilly set by Pink Cat Studio that I bought last year. She reminds me of summertime, so I decided to use her for my card. As you probably already know, I LOVE distress inks, so I had to incorporate it somehow on my card. Since they are blendable, it made a nice watery background for Lilly. I added some crystals using my flourish template and added the CC's sentiment that coordinates so well with mermaids and other sea life. My OCS partner this month is Brenda (Punch Queen). Hope she likes it! Supplies:
  • Mermaid Lilly stamp- Pink Cat Studio
  • Fintastic sentiment- CC's Designs
  • Distress inks- Ranger
  • Stickles
  • Crystals- Hero Arts
  • Cardstock- Bazzil

Wednesday, September 22, 2010

September OCS From The Punch Queen

I was floored when I got my OCS from Brenda this month. She has dazzled me again with her punch creativity! I just don't see my punches the way she does- so creative yah? She snuck in some goodies that she also made- I love it! Thank you Brenda! My daughter is year of the monkey, so the monkey photo holder is perfect to tote her photos with me. The bear post it holder is cute too. I put them back in the plastic for now- I need to just admire them for awhile before I use them! OK- so here's a better look at that gorgeous card! Look at all the bling on those feathers! OK- here's a beter look at the bling.. I also love the embossing folder she used for the background. I actually have that embossing folder but have not used it yet. Looks like I need to try it out too! Here's that oh so cute monkey! And the bear post it holder... Thank you so much Brenda! I love all of it!

Tuesday, September 21, 2010

Tiddly Inks Challenge #22- Sketch Challenge

Please scroll down to see my other posts for today... Guess I had a lot to share! I guess all the challenge blogs are on the same wavelength cause this is my 3rd sketch challenge this week! Check out the Tiddlyinks Challenge blog for more info on this week's challenge. I think my DH is right, these sketchs do make my cards more professional looking than my usual style. I went a bit out of my comfort zone again and decided to use only pink, ivory and beige on my card. I like how the leaves punched out of the beige came out- totally not my style but the effect came out great! I also attempted to design my own flourish out of pearls. Do you like it? Its totally free hand-no template whatsoever. I was nervous, but I think it came out nice. Decided to use the Tiny Dancer image as my focal point. Bought this digi because DD dances ballet and it reminds me of her. I never thought I would have a daughter that danced ballet, but when I saw a class of little ballerinas at the Y one day, I couldn't resist enrolling Akemi in ballet lessons. Sadly she is talking about quitting, but I'm hoping she will continue. Supplies:
  • Tiny Dancer image- Tiddlyinks
  • Flowers- Wild Orchid Crafts
  • Pearls- Kaisercrafts
  • Leaf punch- MS Crafts
  • Cardstock- Bazzil
  • DP- SU

Spoiled

Just wanted to share/thank some sweet gals for all the goodies/cards I received lately... Well, one of them was awhile ago.. sorry Linda for not posting earlier! She gave me this cute double pocket bag filled with some velcro I wanted and YOGURTLAND bucks (YUM!). Thanks for the Sweet RAK! Miss you! Hope we can craft together again soon! Next is more goodies from Debi- she gave me more than this but this is the most recent. Debi is my CBFF (Crafting BFF!) We are both instructors at Island Scrapbooking and share the love of crafting. She teaches me so much! I'm so glad she moved to Hilo and feel so blessed to have met such a talented friend. She said she thought of me when she got this set since I love snowflakes! We also both discovered Walmart has a pretty good selection of crochet lace too. Thanks for the goodies! And this beautiful card is from Teri. She was so sweet to send a thank you card for the b-day gift I sent her earlier. I just love that flower printed ribbon. Such a simple card but so pretty! Thanks Teri! I'll be back soon with my September OCS from Brenda... you are gonna love it!!

LOTV Challenge #65- Sketch Challenge

I promised you another sketch challenge and this one was way more difficult than yesterday's post. As you can tell from my posts that I just LOVE LOVE, LOVE LOTV images. They are the cutest images and they just make me happy when I make something with them. 'nuff said. OK- so as I already told you, sketches are not my norm, but I'm liking the results. Just picked up this paper from Island Scrapbooking over the weekend (they got TONS of new paper in by the way). There are a bunch of coordinating papers in this color scheme and I think its such a fresh look for winter. Inked up James Bear again and added him to the sketch. I also love snowflakes so instead of circles, I used snowflakes. This was fun and definitely challenging for me! Hope you like it! Supplies:
  • James Bear- LOTV
  • Snowflake punches- MS Crafts
  • Fleur de lis pendant- Spellbinders
  • Cardstock- Bazzil
  • DP- Bo Bunny
  • Crystals- Kaisercrafts
  • Stickles
  • Sentiment- Dandelion Designs
  • Circle and Scallop circle punch- EK Success

Monday, September 20, 2010

CC's Designs Sketch Challenge

After debating a bit, I finally broke down and got this cute Take A Seat set by CC's Designs. This set comes with a lot of different people and cute accessories like couches, walls, stools, etc. that they can sit on. I'm glad I got the set and have no regrets whatsoever. 
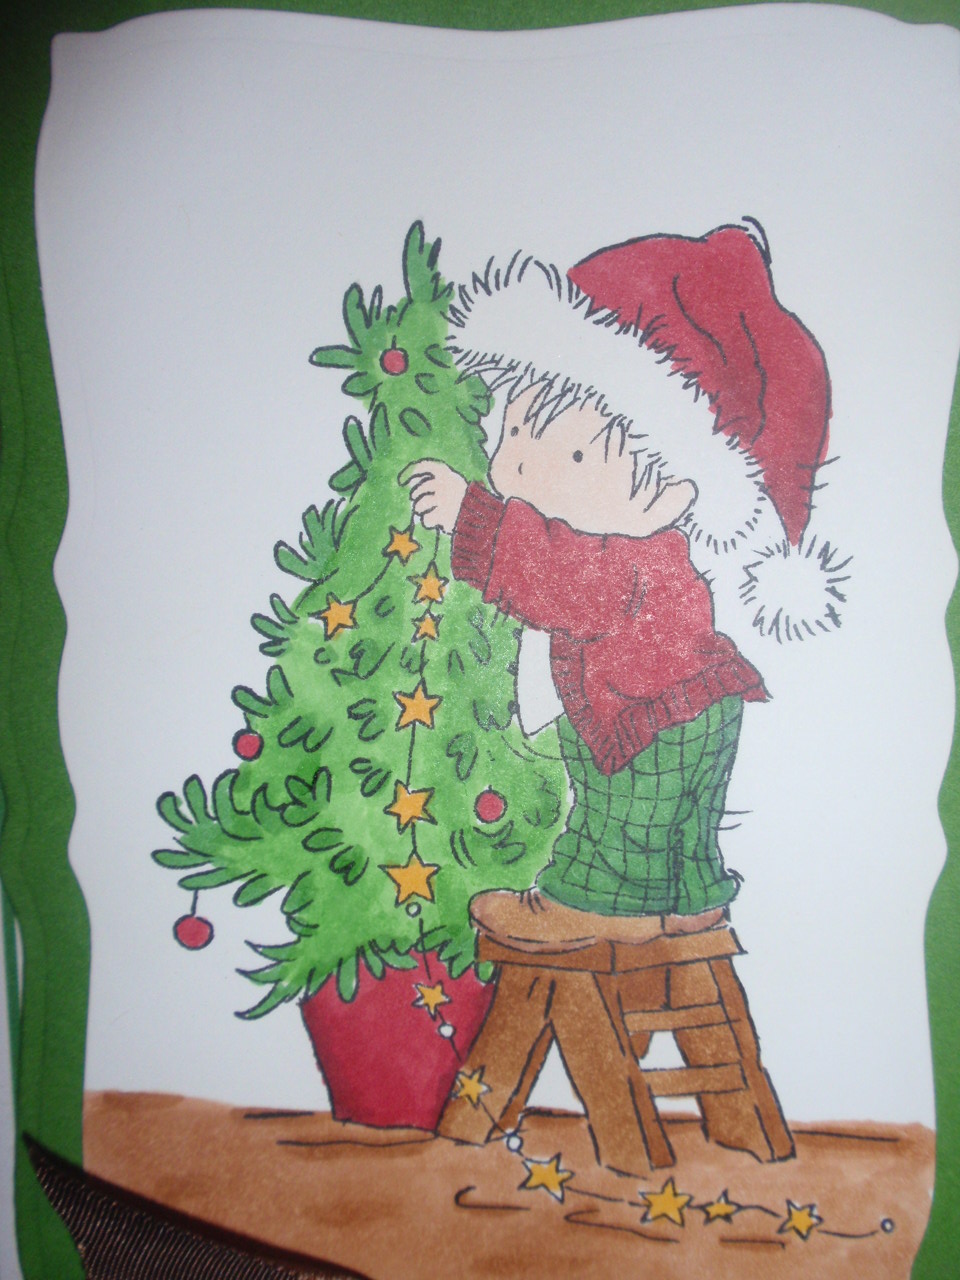
Wanted to try the sketch challenge at the Wednesday Challenge Blog, which was much harder than I thought! I guess I generally don't follow sketches, so I had some difficulty in making sure all my pieces were laid out in the right order. Hope I got it right... Also wanted to kill two birds with one stone and make a card for a special friend. She gave me a RAK recently and I wanted to thank her for it, so I designed this card so that I could also use it as a Thank You. Its in the mail now, so she should be getting it soon. Normally I would wait till she got it, but had to post already since there's the challenge deadline. I hope she likes it! It was my first time playing with crochet lace. I got this from Tamiko's at the Islander Girl Social. I've never used it before, so I wasn't sure what to do with it. Also added on corners from my new set I got from Sizzix. It must be an old set because it was on clearance. Like the paper? I got this plus a whole lot more from the Fall Clearance Sale at Island Scrapbooking this weekend. Someone was selling a lot of SU DP packs for a whopping $6, so I totally scored on this. I like getting coordinating papers, makes my job so much easier. (I make like its my work yah?) Anyway, here's the close up of Emma (I think that's her name). I like that she's holding a rose and the rock wall she's on also has roses on it. Added my own roses from Wild Orchid Crafts too. Since I was planning on giving this card away, I stamped the inside. This is the first time I've used my Verve stamp set and I love it! There are several thank you phrases in this set that fit perfectly in the circle! Plus they are clear, so you get perfect placement everytime! Here's a close up of the sentiment so you can see the detail on the circle I added in some small flatback pearls as accents. Hope you liked my card! My DH thinks the sketch made my card look more professional. I guess I agree with that. It sure took me a long time to make this one card. I have another challenge card to share with you tomorrow- that one is even more complicated than this one!! I'll get the hang of it one day. Supplies:
  • Emma, rock wall stamps- CC's Designs
  • Sentiments and heart flourish circle- Verve stamps
  • circle, scallop circle dies- Spellbinders
  • Scallop oval punch- SU
  • DP- SU
  • Cardstock- Bazzil
  • Corners (flourish)- Sizzix
  • Roses- Wild Orchid Crafts
  • Lace
  • Pearls- Kaisercrafts
  • Butterfly punch- MS Crafts

Saturday, September 18, 2010

Tiddlyinks Challenge #21: Our Pets

OK- I'll admit, my photos have been kinda junk yah? Its normally because I try to take them late at night, no good lighting in the house, so I rely on my junk flash.. My GF Debi told me to try taking day photos- which are difficult for me because I'm usually at work. But since its a weekend, I thought I'd take her advice and try it out. Of course, I waited till the sun was going down, so I had some difficulty with shadows and coloring- my image kept looking really blue. I resorted to correcting the color on the computer. I finally got it to look like what the true image looks like in person. Anyway, hopefully my photos will improve over time... Maybe I need some photography lessons from my GF Les... Or maybe I need to by a small photo studio! :) OK- back to the project... Decided to enter the Tiddlyinks challenge again this week. The challenge was to use one of their images with a pet in it. I had already bought this cute Mavis the cat stamp from Stampinbella and thought she'd be purrrfect for this challenge. To make sure it qualified, I checked with Christy and she said that since its her artwork, she'd allow it. I didn't check with her if I could make a 3-D item, but I'm hoping this still qualifies. I couldn't resist making this watering can (template and instructions can be found here) that I saw on Cami's blog earlier. She did such a cute job that I had to copy her. I decided to paper piece Mavis' dress using some scrap DP. I covered the watering can bottom with some punched grass and then added some roses. Hope you like it! Supplies:
  • Mavis Cat- Stampinbella/Tiddlyinks
  • Grass punch- MS Crafts
  • Roses- Wild Orchid Crafts
  • Watering can template- Splitcoast Stampers

Thursday, September 16, 2010

Decorating The Tree

Hooray! It's another 3-day weekend for me! Just have to get through work today though. I'm back with another LOTV image (I told you I bought a lot!). This one is called Decorating the Tree. I don't normally buy boy images, but I really liked this one- must be because he's wearing a Santa hat? Anyway, this image was pretty large, so I had to use my megabilities Spellbinders this time and go to the larger 5x7 card. Since its a boy card, tried to use my non-feminine paper. As you can see its very plain looking, so I added a chocolate bow- didn't want it to look too girlie. Since I stay away from flowers and bling on boy cards, decided to try a jingle bell that I found while cleaning out my craft room. I kinda like this accent- plus it makes a pretty noise when you shake it! Supplies:
  • Decorating the tree- LOTV
  • Megabilities- Spellbinders
  • Cardstock- Bazzil
  • DP- DCWV
  • Ribbon
  • Jingle bell

Wednesday, September 15, 2010

Snow Bears

Back to my Lili of the Valley stamps! I can't get enough of these cuties! I guess if I were a bear, I'd probably make a bear snowman- I mean snowbear myself! I again cut out the scene using my nesties to keep the falling snow in tact. I didn't realize how much I actually cut out my images, so I found this challenging for me. It was nice to be able to add so much stickles for the snow. Here's a close up of the snowbears... Supplies:
  • Snowbears- LOTV
  • Stickles
  • Seasons Greetings- CC's Designs
  • Circle, Scallop Circle, and labels die- Spellbinders
  • DP- Doodlebug
  • Cardstock- Bazzil
  • Loopy border punch- MS Crafts

Tuesday, September 14, 2010

Another Christmas Card

Made another sample for Island Scrapbooking over the weekend. Decided to play with my other Hero Arts background stamp I got recently. I love this Holly stamp but didn't know what to do with it, so I used the same emboss resist techinque again using gold embossing powder. I then distressed the edges with pine distress ink and the inside with barn door. Since the background was not large enough to fill the space of a 5x7 card, I mounted it on red cardstock and used my MS double loop border punch. Topped it off with a large bow and sentiment. The sentiment was stamped on the Tim Holtz labels die and then I just hand cut the border around it. Making these non cutesie cards are so out of my element. I bet the customers will think Debi made this one! Supplies:
  • Holly background stamp- Hero Arts
  • Merry Christmas sentiment- CC's Designs
  • Distress Ink- Ranger
  • Double loop punch- MS Crafts
  • Gold embossing powder
  • Ribbon
  • Labels die- Tim Holtz Sizzix
  • Cardstock- Bazzil

Monday, September 13, 2010

Peace

I can't believe its Monday already! Where did the weekend go? Guess I've been busy with a alot of projects and family stuff. Just glad its another 4 day week! (Not looking forward to next week- which is 5 days.) Got this new Hero Arts flourish stamp from Island Scrapbooking the other week. Its so pretty, I didn't know what to put it with, so I just left it alone. I finally got some gold embossing powder too, so I decided to emboss it to give it a Christmas feel. Then I used my distress inks in barn door and olive and topped it off with a Peace sentiment. Very simple once I figured out what I was going to do. The only drawback was that I had to use a larger sized card since the flourish is so big. Hope you have a great week! Supplies:
  • Flourish stamp- Hero Arts
  • Peace sentiment- CC's Designs
  • Distress Inks- Ranger
  • Gold Embossing Powder
  • Cardstock- Bazzil

Sunday, September 12, 2010

James Bear- Pile of Presents

This is the last LOTV card I made so far with my new images. I have lots more that I haven't colored up yet. I'm not even sure why I'm making so many Christmas cards since I normally just do a photo card to send to family and friends (they only want to see Akemi anyway!). Guess I can't resist using all the cute new Christmas images this year. I just love this pink snowflake paper and wish I had bought more! I think I am now in hoarding mode for this paper and will use it sparingly. Who can resist pink + snowflakes? Kept the design of this card simple since I used my nesties to cut out the image. Used some of my precious silver mirrored cardstock too since it went perfectly with the pink. I guess I got lazy and stamped the sentiment right on the DP instead of cutting it out. I think it came out nice for being lazy! Supplies:
  • James Bear Pile of Presents- LOTV stamps
  • Snowflake punch- MS Crafts
  • Noel sentiment- CC's Designs
  • Crystals- Kaisercraft
  • Mirrored Cardstock- Bazzil
  • Stickles
  • Square and scallop square nesties- Spellbinders
  • DP- Fancy Pants

Saturday, September 11, 2010

Warmest Wishes

Yay! The weekend is finally here!!! Even though it was technically a short week for me, it felt like forever till the weekend! I had to go to Kona on Wednesday at 4:00am and didn't come home till 6:00pm, which tired me out for the rest of the week. I'm just glad I can relax today! As promised, here's more of my new LOTV stamped cards to share. As you can tell, I'm in love with their stamps! This is James Bear in the snow. When I saw him on the previews, I knew he'd be first on my list. Since I wanted to keep the snow in tact, I decided to cut him out using my nesties. My flash seemed to ruin the photo- sorry! The good thing is you can see where I used my liquid pearls for his hat and stickles for the snow. While cleaning up, I found some Jolee's snowflake stickers and added them to this card. Please visit again soon... I have one more card to share using LOTV images. Supplies:
  • James Bear- LOTV Stamps
  • Oval and scallop oval nesties
  • Stickles
  • Liquid Pearls
  • Cardstock- Bazzil
  • Snowflake stickers- Jolee's
  • Crystals- Kaisercraft
  • Warmest Wishes- CC's Designs