Showing posts with label Scrapbook. Show all posts

Wednesday, March 20, 2013

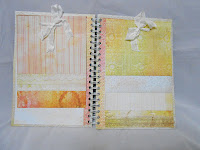
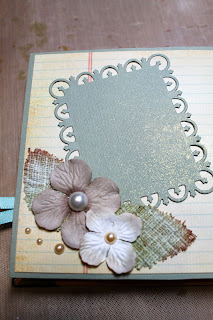
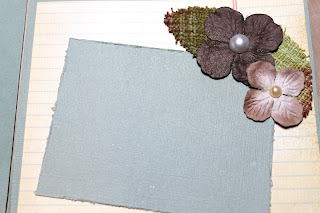
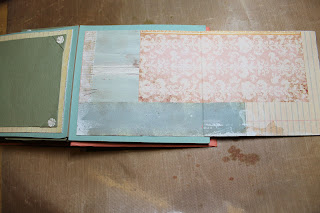
Mixed Media Waterfall Album

Hello!  I'm pre-scheduling this post, so I'm thinking this will be mid week by the time you see this.  I told you I've been busy crafting right?  Yup, when the creative juices are flowing, you have to seize the day and make as much as you can.  I stayed up till 2am over the weekend working on lots of projects, so now I have lots of stuff to post!

OK so as I was watching Prima Live with Leeza Gibbons, and Frank's previous Prima Live show featuring Leeza's new waterfall album, I was inspired to make my own version.  Yes, there are no stores here  in Hilo that carry that album, so I thought I'd try to make something similar.  Here's what I came up with.. yes, not nearly as nice as the Prima version, but enough to satisfy me...


I started with some cereal boxes for my covers.  Used my new Sunrise/Sunset papers by Prima.  LOVE THEM!  I chose the lace printed ones for the covers.  After I covered both, I punched the holes using my cinch and attached the binding.

Then I started decorating the cover... started with some chicken wire I bought from our local Ace store and sprayed it with white paint to help rustproof it.  After cutting down the wire to the size I wanted, I adhered it using my hot glue gun.


Then I added some burlap leaves I cut using a Sizzix die and burlap fabric.  The fabric was a light sage color, so I used my distress stains again to make the color how I wanted it to look.  Then I added some gesso to make it look distressed.  After going through my stash, I picked out some flowers by Wild Orchid Crafts, some shabby flower trim, pearls and metal flowers from the sunrise/sunset collection.  I also pulled some wood mushrooms and leaves from Prima.  And do you see the keyhole above the mushrooms?  I cut that from a Tim Holtz die and painted it white.


After I was done with the cover, I got the key that was also cut from the same Tim Holtz die and painted it with gesso and added a white heart pearl by Doodlebug.  Used some twine to attach it to the binding.  On the other end of the twine, I added another metal flower, bauble and pearl


 And now for a look on the inside... I picked out different patterns from the sunrise/sunset line and cut them down to 6" x 9 1/2", and about 1 1/2" shorter for each layering piece.  There are 4 pages on each side, so a total of 8 pages.  I thought I could use the bulkier embellishments like flowers on the part that extends past the page above it.  Before adhering it down to the covers, I punched holes and attached them using seam binding.


Now I wish I had distressed the edges of the pages, but I thought it was just my prototype!  Oh well, maybe next time I'll remember to do so.

Friday, February 22, 2013

Mick and Mattie

This is the year that me and my friends turn the big 4-0!  I thought I should do something special for them, so I've been busy looking for project ideas that they would like.  My friend Les is a photography enthusiast and even travels just for photo opportunities.  She has taken our family photos several times over now and has even done some family shots for some of my family.  Her birthday was this week, but I wasn't able to deliver the present like I had hoped.  I hope she picks up the gift and opens it before she sees this!

Here's what I came up with....


When I saw this project... I knew I had to figure out how to make one for her!!  It was a bit intimidating, especially since there were no set dimensions in inches, etc. I had to figure some of it out myself, but after I started going, it wasn't too bad.

I wanted to make a matching layout for her and decided to ask her for a photo of her doggies.  Mick and Mattie are her babies, so I knew she would like a layout featuring them.


I started by distressing the edges and then using my distress ink, distressed it in pink.  I like the look since the pink shows through but the rest of the paper remains white polka dots.

Next, I added a die cut of Tim Holtz's vintage camera.  I've been wanting to use this die, but didn't have any use for it.  This was the perfect project for it.. dont'cha think?  I made the flash by adhering some crystals.  I know you can't tell, but I popped up the camera several times to add dimension and finally added pink to the back of it and some acetate where the lens would be.


I added in a strip of rhinestone bling to balance against the horizontal photo.  Of course, I had to add some flowers right?  Right below the flowers, I made my own rhinestone bow by hot gluing the rhinestone trim together and then adding a pearl in a buckle for the middle.


And finally, I needed a title.. decided to go with the doggie's names.. Mick and Mattie...


 And here's the two cutie pies sharing a couch.  I really don't know how they fit on that couch as they are huge!


And now for the camera!  Stared by making a box and attached the flash and part on the right.  Then I attempted the lens. This was kinda tricky, but i somehow figured it out using my circle punches, acetate and strip.


Inside the lens I added a rose, crystal gem, pearl and Hello Kitty.  The Hello Kitty was part of a cell phone charm and I just took off the strap.


Used some bling mesh to make the flash and a buckle/flat pearl as part of the viewfinder.


I stacked two buttons and added another buckle/pearl for the zoom feature and the flower below for the shutter button.


On the back of the camera, I added a rectangle of mirrored cardstock and a rhinestone border around it.  The buttons on the side are clear with a flower glued to it.  Oh, can't forget the strap... used a single rhinestone bling and inserted them into an eyelet secured hole on each side.


When you open up the box, it looks like this....


I added in a smaller version of Mick and Mattie inside and decorated it using some roses and a small hearty clay butterfly.  I guess I didn't notice the stick pin fell off the rose.  It's supposed to be sticking up.


Here's a closer shot.


Just wanted to wish my friend a Happy Birthday!


Saturday, January 26, 2013

Best Friends

 My daughter has had her best friend since pre-school.  I wanted to do something nice for her, so I decided to try making a layout using a photo from their first play date.   You can't tell from the photo, but they are both sitting inside a batmobile car near the shave ice shop.  I don't think they could both fit in it now!


I really wanted to use my new Prima stencil on this layout, so I started with the Firefly background paper (one of my favorites!) and used my Dreamweaver paste with the stencil.  After pasting, I used some glitter on the paste while it was still wet.  Here's a better look...


For the frame, I used a Sizzix thinlet die and cut it out of watercolor paper.  Then I sprayed it with my Lindy's stamp gang spray.  I know you can't tell from the photo but it has a pearly shimmer to it.


Then it was time to embellish!  So I found all my purple, pink and white flowers and went to town gluing them onto the layout.  Most of them are by Petaloo with a few by Prima, Wild Orchid Crafts, and All Natural Accents.  Forgot to mention that I added in some Zva rhinestone flourishs under the flowers.

Here's the best part!  I got the canvas pennants by Prima recently and wanted to use it on my layout.  I decided to spray them as well to get the color I wanted, then strung them onto some sheer ribbon.  After figuring out where I wanted it to go, I glued them down to the layout and added some white flowers.  Found some chipboard letters and used them to spell out best friends.


Here's the rest of the title.


I have a feeling I will need to make another one soon.  She is now besties with her BFF's sister, so I know they'll be asking for another layout with all three of them!

Friday, January 18, 2013

Puppy Love

This is my dog Kiki.  She is our 11 year old daschund, but this photo is when she was just a puppy. While cleaning out my craft room, I stumbled upon some old photos of my baby.  She is also known as my first daughter.  Little did we know that she is an alpha dog, so it took YEARS to train her that she was not the leader.

Now that Kiki is old, she is more mellow and easier to handle, but I do miss those puppy days when she was so cute!  


So I've been very interested in the art journal/steampunk look for a few weeks now.  I saw someone post an art journal cover from a class they took from Anna Dabrowska.  I gotta say, once I saw how cool her stuff is, I was hooked and became obsessed with finding more and more samples of mixed media art.  If you have time, check out all her projects.  She is also a designer for Prima and Prima will soon carry her line of products! Can't wait!

OK back to the project.  So I started by applying gesso to some watercolor paper.  Then I applied paste (Dreamweaver) to the brick mask (Crafter's Workshop) in two corners of the paper.  This photo shows it pretty good.


After that I cut out a clock from a Tim Holtz die out of acetate and applied white alcohol ink (Ranger) to the clock.  I didn't want the clock to stand out too much, but I did want people to see it, which I why I opted for acetate.  I was hoping that the white alcohol ink would then allow the sprays to color it up.

Then I adhered Kiki's picture and distressed mat piece behind it.  Then I began gluing on flowers and metal trinkets (Tim Holtz) around two corners of the photo and painted them with gesso. Then I covered the photo and started spraying with green, teal gold and brown sprays by Lindy's Stamp Gang.  I used all of the ones with shimmer inside since I wanted the metallic look.  I don't know if it was the gesso or something else I did but I don't think I should've done that.  My friend Tracy told me that she thinks it was the gesso and suggested I use gel medium.  I guess I gotta put that on my list of things to try next time.  I ended up using a lot of spray but the white kept showing through.  Anyone know if the gesso was the mistake or if I did something else wrong?


After I gave up on the spraying, I completely dried the paper and then added my Puppy Love title using black foam thickers.  Since my watercolor paper was not a full 12x12 size, I distressed the edges, and then adhered it to a kraft cardstock and distressed those edges too.  Then I mounted it on a 12x12 chipboard.  I've found that if I don't do that, the corners end up curling.


So I'm open to suggestions.. if you have any recommendations on what I should do to not have so much white resisting, let me know.  I guess I'll have to wait until I get me some gel medium before I attempt this again...

I just realized I'm posting this on Friday... Yay!  We made it to the end of the week! Ready for the long weekend?

Thursday, January 17, 2013

Sweet Baby

First of all, I must apologize for the bad photos.  I had a hard time for some reason.  

Anyway, still on my shabby chic kick... found this old photo of Akemi and wanted to use the turquoise colors in her dress as the color theme for the layout.  Dug up one of the Firefly papers by Prima as the background sheet and really wanted to try the zipper technique in this layout.  At first I thought the purple/pink rose background on the other side would work since her haku lei is purple, but after studying it awhile, I decided to paint over it so that the layout was mostly white and turquoise.


I started by using my new Prima flower mask and adding some paste for dimension.  Did this in the corner and where I wanted the picture to go.  The paste is supposed to take about 1 hr to dry, but I used my heat gun to speed up the process.  Yes, I'm impatient.


Then I cut a mat for the photo and distressed the edges.  Staggered it behind the photo for interest and then adhered it down to the paper.  Then I cut a line up from the bottom of the paper to about where I wanted the zipper to show.  I then trimmed out a triangle and distressed/curled up the edges.  This is where I inserted the zipper- adhered it behind the page.  To fill the hole, I adhered some rosette trim to a paper and adhered it to the back of the zippered area.  At first I wanted to put my sentiment inside the zipper, but it ended up being too small an area, so I scrapped that idea and just added in some heart embellishments I made (see previous post for link to tutorial).  Added an acrylic flower to accent the heart.
.

Now came the fun part!  Embellishing!  I went through my stash and picked out some pearl flouishes, flowers by I Am Roses and Wild Orchid Crafts, acrylic flowers and a feather butterfly.


Then I added the sentiment using white foam thickers.  Couldn't decide on the title so I went with Sweet Baby.


Ok thanks for bearing through these awful photos!  I have something more punky to share tomrrow!

Tuesday, January 15, 2013

That's Amore

I guess I was bit inspired by Valentine's day in this layout.  My real mission was to finally use my Lindy's Stamp Gang sprays!  So promise me you won't laugh.. This is my first layout using the sprays and I had some issues, but the end result was something I could live with, so that's why I'm sharing it with you now.

I stared with a plain white cardstock paper.  That is where I made my mistake.  I think I should've used watercolor paper since spraying can really warp the paper.  Oh well, live and learn.


So the first thing I did was distress the edges.  Then I attempted to use some new stencils and paste I got recently.  I feel rather dum because I think I just tossed out an old bottle of Dreamweaver paste, having vowed I would never paste again, but here I am now using it.  What a waste yah?  Back to the layout... I thought the brick stencil would be fun, so I pasted it in two corners of the layout.  Here's what it looked like after I sprayed them with my Lindy's.  It's hard to tell, but the shimmer sprays come out very pearly- love it!  I think I used bubble gum and cotton candy.


So I decided to go with a Parisian color scheme of pink, black and white... one of my favorite color combos!  Loved this pic by my friend Les (thanks Les!) that she took of Akemi when she came to visit us a couple years ago. Instead of matting the photo like you normally would, I decided to make it off centered for interest.

And what would a Parisian layout be without an Eiffel Tower?  I love this die by La La Land Crafts! At first I thought it was a bit big, but it is actually perfect for layouts!  I love the detail too.  I also used the Twirled Heart Border die by Memory Box. Just love how thin it cuts!


The heart was made using some wire, small flowers and some stickles.  Here's a video by Juliana of I Luv Vintage Scrap that I followed to make my own.  I also used a flourish by Recollections next to the heart along with flowers by Prima.  Since the theme was Parisian, I opted for an "amore" title using some black foam thickers  The black hearts you see are what was cut out from the border die.  Added in some puffy heart stickers from my stash and Prima corner crystals in black.


I'm still learning how to use the sprays.  Hopefully next time I use them I'll get better results!


Monday, January 14, 2013

Sweetie

Ok, so I haven't exactly kept up on scrapbooking my daughter's life.  I guess I got a little bored with it and it just never happened.  Now that I've discovered shabby chic/vintage layouts, I'm in love again with scrapbooking... or maybe it is more wall art?

After the craft fair, holidays, and cleaning up my office, I was finally able to sit down and make my first shabby chic layout.  I had seen quite a few layouts using the torn technique below and I wanted to incorporate it somehow into my layout.  Here's what I came up with...


Before we start on the actual layout.. I just want to point out the hanger!  I just love this hanger by Melissa Francis!!  Found this treasure while at Paper Tales in San Diego...  If you live in San Diego or near that area, you should definitely check out Michelle's store!  (Hi Michelle!)  I need to find my photos of that store and post them.  She has some beautifully shabby products that I snapped up and am so glad I did.  This hanger was one of them!

OK on to the layout...  This is one of my favorite photos of my daughter.  My friend Les took them for us when Akemi turned 1.  I took the photo and turned it into black and white since I thought it would give a better vintage feel.  The paper used is one of the Tea Thyme papers by Prima, which I ordered by Hopscotch Crafts.  Drew has some hard to find products that I just love!  Go check out his site for more Prima goodness..


I stared by distressing all edges of the paper in the back and on top.  Then I added some Distress ink in Tattered Rose and Vintage Photo.  I love this look- it really makes the image pop when the edges are darker.

To get the torn page effect, I used a craft knife and cut a + about where I wanted the photo.  Then I distressed and curled the edges back.  Since the top paper was cropped down a little smaller than the back sheet, I had to figure out where to adhere the photo so that it showed through the window.  After finding the right position, I adhered it down and then adhered the top paper over it, which allows the picture to show through the hole.


Then it was time to decorate! First I decided to use some lace I had stashed.  I really can't remember where I got it from. I have a feeling it was at Walmart, but not certain.  Anyway, it was originally white, but the white color didn't match the layout.  I really wanted to use that lace, so I decided to add some color myself.  I ended up opting for some Lindy's Stamp Gang sprays in sand and then drying it with my heat tool before gluing down.  Then I added some pearl teardrop trim over the lace and added a variety of vintage colored flowers in pink, white, ivory and brown.  Flowers and leaves were from I am Roses, Prima, and Wild Orchid Crafts.


Finally, my page needed a title, so I decided on my pet name for Akemi.. Sweetie.  Used some white foam thickers I had in my stash and colored them using some vintage photo distress ink to match.

I have another layout to share with you soon.  Thank for stopping by!

Monday, May 14, 2012

Paper Bag Mini Challenge

 What a fun weekend!  Just came back from my trip to Honolulu and boy did I pack in a lot of shopping!  I was able to hit the Rubber Stamp Expo and did a lot of damage there. Then went to eat Dim Sum with the Dim Sum Gang.  After lunch, headed to Ala Moana, Step 'n Up, and Ben Franklin for more shopping.  I was pooped by the time I got home, but I felt very accomplished!

One day a few months back, Kimmie, Mrs. Lum, and I were discussing the paper bag mini album.  I asked them if they've ever made one and neither of them did.  So we decided we should all make one as a "challenge" and each person picked two things to include in our mini.  The criteria was to use: lace, any kind of bling, butterflies, punches, tags, and I think flowers.

We were also supposed to use what we had at home, and not buy anything for the project.  Well, that rule went out the door quickly for me as I tried to make the mini using some old lunchbags I had bought earlier.  These were the kind you get from a drug store, not a craft store.  Well, after pulling out my hair in frustration, I caved and bought me some lunch bags from Ben Franklin.  For some reason, these were folded more uniformly, so I didn't have as much "bag" showing.  It was totally worth it.

Since I already broke that rule, I decide to break more and buy this new Prima Songbird paper.  I couldn't resist. It was so pretty and so vintage-y looking, which is just the feel I wanted for my album.  I also found these Tim Holtz corners that I wanted to use now that I've seen others use them on their mini's and loved it. 


Oh yes, wanted to point out the embellishments.  I have always wanted to use these heart stick pins and the colors perfectly matched my project, so I added them behind the Prima flowers.  I also tied this cute lock and key charms to the bow.  I think they are also by Prima.

I don't think you can see from the photos but the flowers were sprayed with my new Perfect Pearls mist.  Love it!

Here's the front inside cover and first page.  I left them blank for now, but will likely add a label or something to the first page.  The ribbon was added to cover the paper bag that was showing in the crack.  Yes, I guess my papers didn't line up well enough.  sigh.  Thank goodness for the Ace of Cakes technique where you add things over your mistakes.


Here's my 2nd page.  Now that I look at it, I realized I took this photo before I finished my album!  What's missing is two butterflies I cut from my CC's designs butterfly dies.  I formed the heart made of all natural accent flowers and pearls.  The pockets were trimmed with some lace and over the lace I added some Recollections double pearl strand that I got from Michaels. Now I wish I bought more!  Added in two small tags by PTI- I like that you can still see the birds on each side.


 Here's the third page.  I accented the pages with prima flowers and pearls.  The die used on the 2nd page is by PTI- love that it comes in 2 sizes for layering.  The bird and branch punch is by SU and the stamp is by PTI.


Here's a close up of the flowers.


 If you pull open the page (downward), it opens up and you can add in a photo on the bottom half.  Added some PTI buttons for accent.


Here's a close up of the bird.
And here's what it looks like when you flip the page upwards.  I used a Spellbinder die to cut the label mat and again used the PTI buttons as accents.  Do you see my branch punch by MS Crafts?  That's to cover up the paper bag that was showing through again.


For the next pages I used another Spellbinder die for the mat.  I love that die- it makes such a nice frame.  Then added more flowers and pearl accents.  The middle pocket was trimmed with butterfly lace I got from Walmart of all places.  I added stickles on it for some bling and pearl accents.  The two tags inside are cut using another PTI tag die.


Can you tell I sprayed my Perfect Pearls mist again?  Had fun playing with it.. can you tell?


Here's the other side of the page.


Added more flowers and pearls and another photo mat.


Here's another fun layout.  I decided to use the full page size for larger photos. Used some scraps to make photo corners and accented them with those flowers again.  But wait....


You can flip open the left side to reveal more space to add photos and/or journaling...


 And the same goes for the right side..  Isn't that fun?


And here's the last page... I really wanted to use the birds again at the end.  Since this was a pretty large picture so no photo could be added, I decided to just put the photo mat on the back cover instead.  I then added the Lawn Fawn banner and added in the word "Friends" inside.  The string for the banner was actually from a PTI set.


Here's a close up of the banner and the birds.


 So during lunch I shared this mini with the girls and found out I was the only one who brought mine!  So I have yet to see what they've created thus far on their minis.  I can't wait to see. 

So if you go on you tube and watch all the tutorials, they will all tell  you how easy it is to put together a paper bag mini... well don't believe them!!! hahahahahaha!  Right Kimmie and Mrs. Lum?  Seriously... I don't know if I'll ever do one again.  I guess I'd better cherish this one!