Monday, June 28, 2010

Stationary Box and B-Day Fun

I've had the instructions for this stationary box forever, but haven't had the time or patience to do it. Its actually very easy to put together, its filling it that is time consuming...
Here's the box opened up. As you can see I didn't do the stuff that is supposed to go on the other side like the address book, pen holder, and postage stamp holder.. Oh well- maybe next time.
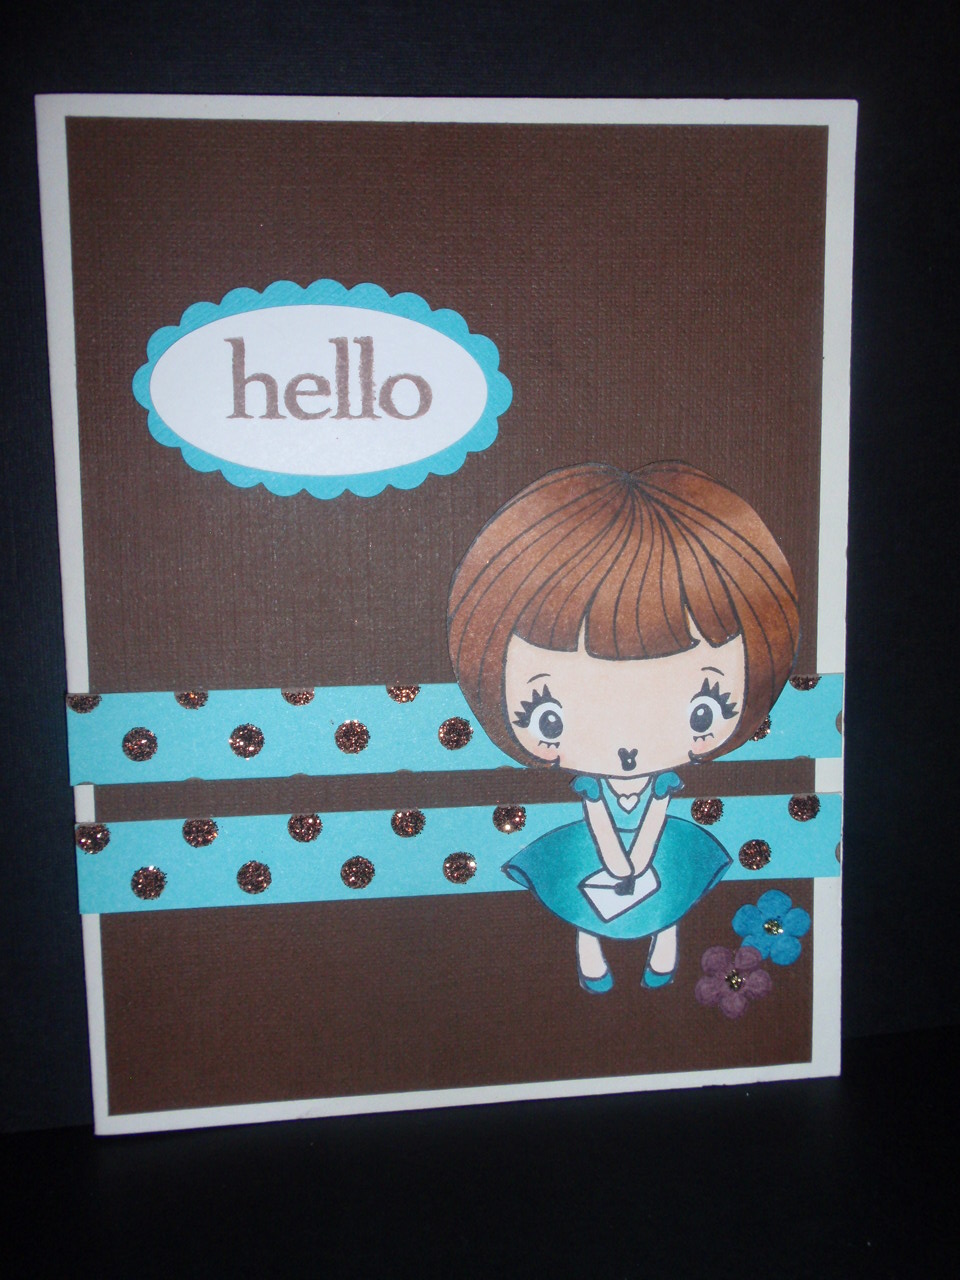
Here's the cards I made... tried to do some simple cards.
Here's the 3x3 cards for the small pocket....
Here's the tags I made for the other pocket.
And now for some fun b-day photos! Akemi celebrated her 6th b-day (1 month late) at a beach house... I am red as a lobster but it was worth it!
Nothing like a good old fashioned donut eating contest... the powder sugar kine! We even did one for the "big kids"... my DH won by downing the whole donut in one bite!
Here's the pinata my DH made for the party... He was determined to make his own and wanted it to look like the invitation.
The kids (young and old) were in the water ALL day!
Even Kiki wanted to join in the fun and swam with us.
Boy am I beat! That was so much fun! Special thanks to Uncle Roy, Erik, Uncle Kyle and Grandma Kat for all your help this weekend! :)

Thursday, June 24, 2010

Drum Roll Please...

For this year's Fodder's Day (Akemi talk) gift, I thought I'd make my DH a shadowbox frame of his other passion in life (besides his family)... Taiko! He is the Director of Puna Taiko and can talk about Taiko all day long if I let him. Anyway, I normally make him something with our daughter on it, but this time I got inspired to make it taiko related.
Since I've never seen any taiko related scrapbooking stuff, I decided to make my own. Do you like my taiko drum? Made it out of an oval spellbinder and punched out small ovals for the "skins". To simulate the hardware, used my mini brads. To give the skin the worn look, I used my distress inks on the sides.
If you look closely at the large photo (taken at last year's Taiko Concert in Hilo), they have their Puna Taiko banner in red... I made a similar banner using my computer and printed it on red cardstock. Then just trimmed the end to look like a flag and rolled the top part over a bamboo skewer and hung gold cord from the top. Its amazing what you can do with a little paper and supplies in your kitchen yah?
For Fodder's Day, we celebrated by going to eat Dim Sum at Kirin Chinese Restaurant at the Hilton Waikoloa. Yum! You don't appreciate dim sum until you can't get it. We don't have dim sum service in Hilo and the only place I'm aware of that has it on this island is the Hilton. Since we were in Waikoloa for a wedding, we decided to celebrate Fodder's day by eating some ono dim sum! :) Here's DH and DD acting silly while waiting for the dim sum to arrive (no carts like in Honolulu- made to order). DD doesn't like dim sum, so she was happy with won ton mein.
Got them to make a "nice" picture for me too... After the Hilton we went to get dessert at ORANGE TREE!!! You don't know how happy me and DD were to get some frozen yogurt! That totally hit the spot. Although we don't have Orange Tree in Hilo... I know a secret!! Well, maybe its not a secret, but I'm so excited that YOGURTLAND is coming to Hilo!! WOO HOO! I will be first in line to welcome them here. Can't wait can't wait! (Thanks Debi for the tip!)
Hope everyone had a nice Fodder's Day! I came home sick as a dog, so that's why I'm so late in posting this.

Tuesday, June 22, 2010

What A Difference A Tear Can Make!

So since I finally got my craft mat (Thanks Michele), I got brave enough to try using my distress inks and water. According to Tim Holtz, the inks are reactive with water, so thought I'd give it a try. My first attempt didn't pan out too well, so this was actually my second card. I just patted the ink on my mat and spritzed it with water and ran my paper over the watered down ink. Then I heated it with my heat gun and then stamped it with the crane stamp. Used my gold mica powder again on the crane and finished it off with a kanji thank you stamp. Believe it or not.. this was it looked like after I did all that (minus the sentiment). I wasn't pleased to say the least, so I put it aside and worked on other cards... Then I remembered something Michele did to one of her cards.. All she did was tear one edge and what a difference it made! I haven't used that teachnique in ages, so I thought I'd try it to see if it would help this card. It sure added that little something that it needed! Thanks Michele for inspiring me! Sometimes you just need to revisit something old and its new all over again! Supplies:
  • Crane Stamp- Hanko
  • Mica powder
  • Distress inks- Ranger
  • Cardstock- Bazzil
  • Thanks stamp- Hero Arts

Monday, June 21, 2010

Friends in Distress

Just playing around with my distress inks again... Used the Spun Sugar and Worn Lipstick colors on my new Tim Holtz Craft Mat by Ranger!! Love it! Somehow it makes my blending smoother. Then I used a Hero Arts cling background stamp and covered it with gold mica powder. Isn't she a cutie!!! Supplies:
  • Girl, friends, and background stamps- Hero Arts
  • Mica powder
  • Oval and scallop oval punch- SU
  • Distress inks- Ranger
  • Cardstock- Bazzil

Sunday, June 20, 2010

Distressed Sympathy

As you already know, sympathy cards are my least favorite type of card to make. I finally broke down and bought a few sympathy stamps "in case". This is my favorite one by far- its by Paper Inspirations and there are all types of sentiments aside from sympathy. My friend's father recently passed away, so I wanted to make a card to send to her and her family. I decided to go with the distressed look again but kept it more subtle. Used some of the colors that I haven't played with yet (weathered wood, bundled sage) and then stamped it with the fern stamp using versamark and applied mica powder. Also got a sympathy stamp set by CC's Designs from Island Scrapbooking. This set has a great variety of sentiments- I'm sure you'll find one that is appropriate in this set. Used one of the sentiments for the inside of the card. Supplies:
  • Distress inks- Ranger
  • Sympathy stamp (cover)- Paper Inspirations
  • Sympathy sentiment- CC's Designs
  • Cardstock- Bazzil
  • Fern stamp- Stamp Yourself Silly

Saturday, June 19, 2010

Let's Chill!

Yay! Its the weekend!!! Woo hoo! I totally need some R&R this weekend. Just got this new Honey Summer stamp by CC's Designs and wanted to make a card with it... For some reason, I felt she should be citrusy (is that a word?), so I used yellow, green, and orange. This Honey stamp reminds me of my daughter since she's such a beach bum right now. Kept the card simple again and not a lot of detail to the layout. Here's a close up of Honey... Supplies:
  • Honey stamp- CC's designs
  • Oval and scallop oval nesties- Spellbinders
  • DP- Doodlebug
  • Cardstock- Bazzil
  • Flower crystals- Kaisercraft
  • Let's Chill sentiment- Hero Arts

Friday, June 18, 2010

Hello Stella!

Made about half of this card a month ago and its just been sitting on my desk. I think it might have been around the time that I had "crafters block". I found it the other day and finished it off by adding the "hello" sentiment. Boy did that make a difference! I'm sure I could add more detail, but I'm much happier with it now than before I added the sentiment! Well, all I can say is TGIF! Its been one crazy week! Supplies: Stella stamp- TGF DP- Doodlebug Cardstock- Bazzil Flowers- Prima Stickles Hello sentiment- Hero arts oval and scallop oval punches- SU

Thursday, June 17, 2010

Little Cotton Rabbits

When I saw these stamps I fell in love with them! They so remind me of Akemi's Daba (stuffed bunny). I couldn't resist getting the whole family from Funky Kits. They also have a bear, monkey and fox dolls. I read about them on the Sugar Nellie blog and there was a link to the real rabbit dolls. The real dolls are so cute too! For now, I'll have to settle on the rubber stamps since the real ones are hard to get. So, I immediately thought of my friend Debi when I saw these bunnies and made this card for her. We often swap ideas and teach each other new techniques, so I wanted to give her a little something for being such a sweet friend. This bunny family stamp set also comes with coordinating bunny sentiments too. Love it! Here's a closer look at the little cotton rabbits! Supplies:
  • Little Cotton Rabbits- Sugar Nellie
  • Flowers- Prima
  • DP- October Afternoon
  • Cardstock- Bazzil
  • Oval and scallop oval dies- Spellbinder
  • Ribbon

Wednesday, June 16, 2010

Its Party Tiime!

Yes, Akemi's b-day was last month, but we were so busy with her ballet that we couldn't squeeze in her b-day party. Instead, we are planning it for the end of this month and its turning out to be much bigger than we initially thought. I'm glad everyone is planning on coming- even from Oahu! It will be nice to see everyone again.
Since it will be at a beach house, we decided to go with an ocean theme... and you guessed it! Had to use my new Create A Critter cartridge! Akemi chose the animals and I found this cute sand dollar paper at Island Scrapbooking for the background.
Supplies:
Cardstock- Bazzil
DP- The Paper Company
Sea creatures- Create A Critter Cricut Cartridge
Labels Dies- Spellbinders

Tuesday, June 15, 2010

Fairy Friend

Yes.. still on my distress kick.... Made this card for Teri. Hope she likes it! I used distress inks again for the background and stamped the LOTV fairy image and friend sentiment in versamark- then applied mica powder to the images for a subtle look. You can't tell from the photo but the fairy and the sentiment are metallic blue. Then I embellished it with flowers, crystals, and pearls.
Supplies:
Distress inks- Ranger
Fairy stamp- LOTV
Friend sentiment- Hero Arts
Flowers- Prima
Crystals and pearls- Kaisercraft
Cardstock- Bazzil

Monday, June 14, 2010

Happy Birthday Stef!

Saw my SIL this past weekend and gave her her b-day present (late)... Hope she likes it! ha ha ha ha ha. A long time ago, we got this angel statue and its been the running joke ever since to give to someone for their b-day or xmas. Its totally been vandalized to look like Gene Simmons of KISS. So now its in Stef's hands as we patiently await to see who will receive it next. Oh yah- whoever has it must add something to the angel... This time we just added a clothes pin to his hands so he could hold her gift card, but he's had tatoos, manicures, measels, you name it! This is the card I made for her.. used my distress inks (again) for the background and found this old butterfly stamp in my stash. I just got the sentiment stamps by CC's Designs from Island Scrapbooking. Its neat because the two sets coordinate with each other and it saves a lot of space on your card. Happy Birthday Stef!

Friday, June 11, 2010

Father's Day Card Make 'n Take

Every once in awhile I am able to make a masculine card that I'm happy with. For the June Craft Night at Island Scrapbooking, I had to come up with a make 'n take and wanted to do something for Father's day that is coming up this month. Also wanted to show customers another way to use mica powders (besides w/stencils), so decided to use that technique for this card. It's amazing how many people don't know how to use mica powders with stamps- so simple but nice effect! This flourish gave me another reason to use my Iron Gate punch by Martha Stewart (Love it!). Customers had a blast making this card because it taught them a new technique and it was quick an easy. If you are ever in Hilo- hope you can join us for a fun night of crafting, socializing, and fun!

Thursday, June 10, 2010

Monster Birthday!

Hi Everyone! I'm soooo happy this is a short week. Tomorrow is my Friday since Friday is really a holiday! Woo Hoo! Still gotta finish cutting kits for my class on Friday, but took a break to make this Monster Pop Up Card. Found the tutorial on Teri's blog (thanks Teri!) and adapted the size so that it was smaller to use as a card. Once in awhile I think of how to add some pizzaz to the card by adding hanging stuff from it.. The last one I did looked like an obon since I hung lanterns across the top of the card (click here). As I was looking at the obon card, I got inspired by the hanging lanterns and thought of flag banners- the kind you used to see at car dealerships and thought that would be cool to hang from the top of this card! This monster stamp set by Hero Arts was the perfect match for a birthday card, so I used that to decorate the card. Here's the inside of the card.... see the flag banner? I just cut out triangles on the fold and put adhesive inside so it clamped over the string.
Here's the top view of the card so you can see what I mean about the flag banner...
Hope you like it! The tedious part was coloring and cutting out all those small monsters! Let's just say that this card is definitely one of a kind (translation: I won't be making another one anytime soon!).
Supplies:
  • Cardstock- Bazzil
  • DP- Doodlebug
  • Monsters & Sentiments- Hero Arts
  • Ribbon
  • Scallop circle and circle punch- Marvy

Tuesday, June 8, 2010

Bugs and Kisses Side Step Card

Hi Everyone!
Needed some practice making step cards for my upcoming class on Friday. I made this side step card using my Swiss Pixie stamps by CC's that I didn't ink up yet. These little bugs are so cute! Decided to pair them up with my Hero Arts Bugs and Kisses set that I got awhile ago but didn't really use.
Of course I had to do some distressing...
Here's a close up of Hansle the bee...
Supplies:
  • Swiss pixie stamps- CC' s designs
  • bugs and sentiment stamps- Hero Arts
  • Cardstock- Bazzil
  • DP- Jillybean
  • Distress ink- Ranger

Monday, June 7, 2010

Island Scrapbooking Craft Night Swap Cards

Every first Friday of the month, Island Scrapbooking hosts Craft Night, where customers can come, learn about something new or do a make 'n take, and shop after regular store hours. We also host a card drawing, where participants who want to swap cards can bring in a card they made and we draw numbers to see who gets which card. Normally you only bring in one card, but I decided to make one for Michele too since she didn't have time to make a card for herself. Since I'm "distress happy" now days, I used my distress inks to come up with these two cards.
We also made a father's day card for the free make 'n take but I forgot to take a photo of it. I will try to get a picture of it and post it soon. We used mica powders with stamping for a nice "manly" effect.
Supplies:
Distress inks- Ranger
Sakura background stamp- Judikins
All other stamps- Hero Arts Carstock- Bazzil
Mica powders

Sunday, June 6, 2010

May OCS

Hi Everyone! What a busy week! I'm just glad today is Sunday and I have a day to relax. Received this cute card from Joni at Crafty Hula Hands for my May OCS. Isn't it so cute?? She made this Cheeky stamp by TGF dangle from the top of this tent card using jump rings. I had to laugh because I was kinda late in sending my card to her and forgot to take a photo of it. (You can see my card on her blog.) She wrote to me and told me that she forgot to write in my card, so the card came to me blank. I guess we were both rushing to finish! Thank you Joni! Love the card!

Saturday, June 5, 2010

Let's Hang Out!

OK- I have to admit that I am very happy with how this card turned out! I was actually browsing my Create A Critter Cartridge booklet to figure out what critter to use for my step card class and stumbed on this cute monkey. Monkeys remind me of Akemi since she's born year of the monkey. I thought it would be good to use, but not on the side step card since there wouldn't be another side for the vine to connect to. If you know me, you know I'm already thinking about how to hang the monkey, so this is what I came up with. I remembered seeing a sample of this type of card on Splitcoast Stamper's forums. Unfortunately, the only template/measurements I could find were all in metric, so I just made this up using the side step template instead. The other challenge of this card was the vine. When I originally cut it out using the same dimensions as the monkey, it was way too small and difficult to connect to another one... I finally figured it out... DUH! Just increase the size of the vine! Hello!? That seemed to do the trick and now my monkey has a vine to hang from. The other cool feature of this cartridge is that almost every critter comes with some type of phrase that coordinates with them. "Let's Hang Out" was paired with the monkey- how perfect is that for my card??? Yay- less things for me to worry about. The last challenge of this card was that since I was going to hang the monkey, he kinda covered the words! I had to move the words to the top of the card, that way, when the card was opened, he wouldn't block the sentiment. Thanks for stopping by! Supplies:
  • Monkey, Vine and sentiment- Create a Critter Cricut Cartridge (Nancy Kubo)
  • DP- Doodlebug
  • Cardstock- Bazzil

Friday, June 4, 2010

More Distress Thank Yous

Hello there! Just thought I'd remind everyone about the free make 'n take at Island Scrapbooking tonight. I'm doing a Father's Day card using mica powders for those that attend. Hope to see you there! Just wanted to share more of the thank you cards I made for Akemi to give to friends and family. Busted out my old stamps- sorry, can't remember what company they are made by! I'll do my best to log them at the end in my supply list. Akemi actually told me to add the panda to the first card. I'm so glad she did, because it gave the card some life! He matched perfectly too. She said there should be a panda because they eat bamboo. Thanks Akemi! The next card came out very light, but I like the effect since all the other cards were so dark. I stamped the kanji background stamp using the same linen distress ink that was used for the background. Dug up my old butterfly stamp that I think I used maybe once before, but thought it would be perfect for this card. Not sure if you can see but the brown cardstock in the back was embossed using my cuttlebug embossing folders. It was an asian looking set I got from Photocraft. This next card is actually one of my favorites. I bought this large background stamp that had a sakura design years ago, but never really used it cause I didn't really know how to get good images from a large stamp. Now that I know how (thanks Debi!), I was able to make this work for me. The dotted design makes a nice background for this card, but doesn't overwhelm it to distract from the image. Its a little hard to see, but I think my flash caught some of the gold at the bottom of the card so you can see the design. The image was stamped with versamark and then coated with gold mica powder to give it the metallic look. Since the background stamp was asian, I used Geisha Anya (colored by Akemi) and the Thank You sentiment from Hero Arts.
Supplies:
  • Geisha Anya- TGF
  • Thank you sentiment- Hero Arts
  • Thanks sentiment- Hero Arts
  • Panda stamp- Inkadinkado
  • Butterfly stamp- Hanko
  • Bamboo stamp- Stampendous
  • Kanji background- Hero Arts
  • Sakura background- Judikins
  • Mica powders
  • Distress Inks- Ranger
  • Cardstock- Bazzil
  • Embossing folder- Cuttlebug

Thursday, June 3, 2010

A View From The Ocean

Took a short break from distressing and needed to make a sample for an upcoming class at Island Scrapbooking. Decided to play with my new Create A Critter Cartridge by Nancy Kubo and had a blast putting this card together. These critters are soooo cute! Totally my style and so much easier to put together than some of my other cartridges. There are only a few pieces and they are not that small, so easy to work with. I think my students will like it too. Since I wanted to include the cute crab and sandcastle, I decided to make the view from the ocean and make the "land" stuff at a distance. That's the great thing about step cards, it automatically gives your card dimension and depth. I'll share my other card for this class later. Supplies: All die cuts- Create A Critter Cricut Cartridge (Nancy Kubo) DP- Doodlebug Cardstock- Bazzil

Wednesday, June 2, 2010

Friends Are Special Treasures

Had some craft therapy the other day with my girls at Island Scrapbooking. It was so nice to just talk story and have a good time.... I'm so blessed to have met such a talented group of ladies!

When I get "stuck" on a card that I can't seem to finish, I often consult with one (or all) of them to help me finish my project. I took this half done project to the store and the girls helped me choose a nice sentiment to finish off the card. This "thinking of you" sentiment was just the right size and font to match this card. Thanks girls! I decided to use the mica powders again on the sentiment so that it matched the flourish at the bottom of the card. I finished off the card with the iron gate border punch by Martha Stewart. I was afriad I wasn't going to use this punch much, but got it anyway and I'm not sorry I did... I've been using it quite often on my recent projects. Its works nicely with this Hero Arts stamp set I just got. I love it when you can find things that are not made by the same manufacturer that actually go together! So glad its Wendesday already! Yay!

Supplies: Distress inks- Ranger All stamps- Hero Arts Iron gate punch- Martha Stewart Crafts Cardstock- Bazzil Mica powders