What a fun weekend! Just came back from my trip to Honolulu and boy did I pack in a lot of shopping! I was able to hit the Rubber Stamp Expo and did a lot of damage there. Then went to eat Dim Sum with the Dim Sum Gang. After lunch, headed to Ala Moana, Step 'n Up, and Ben Franklin for more shopping. I was pooped by the time I got home, but I felt very accomplished!
One day a few months back, Kimmie, Mrs. Lum, and I were discussing the paper bag mini album. I asked them if they've ever made one and neither of them did. So we decided we should all make one as a "challenge" and each person picked two things to include in our mini. The criteria was to use: lace, any kind of bling, butterflies, punches, tags, and I think flowers.
We were also supposed to use what we had at home, and not buy anything for the project. Well, that rule went out the door quickly for me as I tried to make the mini using some old lunchbags I had bought earlier. These were the kind you get from a drug store, not a craft store. Well, after pulling out my hair in frustration, I caved and bought me some lunch bags from Ben Franklin. For some reason, these were folded more uniformly, so I didn't have as much "bag" showing. It was totally worth it.
Since I already broke that rule, I decide to break more and buy this new Prima Songbird paper. I couldn't resist. It was so pretty and so vintage-y looking, which is just the feel I wanted for my album. I also found these Tim Holtz corners that I wanted to use now that I've seen others use them on their mini's and loved it.
Oh yes, wanted to point out the embellishments. I have always wanted to use these heart stick pins and the colors perfectly matched my project, so I added them behind the Prima flowers. I also tied this cute lock and key charms to the bow. I think they are also by Prima.
I don't think you can see from the photos but the flowers were sprayed with my new Perfect Pearls mist. Love it!
Here's the front inside cover and first page. I left them blank for now, but will likely add a label or something to the first page. The ribbon was added to cover the paper bag that was showing in the crack. Yes, I guess my papers didn't line up well enough. sigh. Thank goodness for the Ace of Cakes technique where you add things over your mistakes.
Here's my 2nd page. Now that I look at it, I realized I took this photo before I finished my album! What's missing is two butterflies I cut from my CC's designs butterfly dies. I formed the heart made of all natural accent flowers and pearls. The pockets were trimmed with some lace and over the lace I added some Recollections double pearl strand that I got from Michaels. Now I wish I bought more! Added in two small tags by PTI- I like that you can still see the birds on each side.
Here's the third page. I accented the pages with prima flowers and pearls. The die used on the 2nd page is by PTI- love that it comes in 2 sizes for layering. The bird and branch punch is by SU and the stamp is by PTI.
Here's a close up of the flowers.
If you pull open the page (downward), it opens up and you can add in a photo on the bottom half. Added some PTI buttons for accent.
Here's a close up of the bird.
And here's what it looks like when you flip the page upwards. I used a Spellbinder die to cut the label mat and again used the PTI buttons as accents. Do you see my branch punch by MS Crafts? That's to cover up the paper bag that was showing through again.
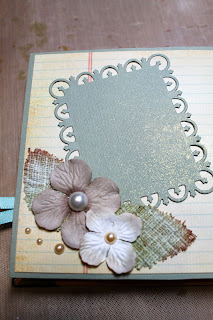
For the next pages I used another Spellbinder die for the mat. I love that die- it makes such a nice frame. Then added more flowers and pearl accents. The middle pocket was trimmed with butterfly lace I got from Walmart of all places. I added stickles on it for some bling and pearl accents. The two tags inside are cut using another PTI tag die.
Can you tell I sprayed my Perfect Pearls mist again? Had fun playing with it.. can you tell?
Here's the other side of the page.
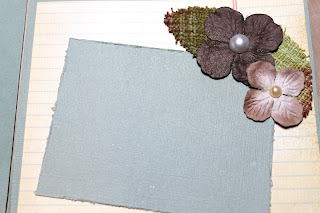
Added more flowers and pearls and another photo mat.
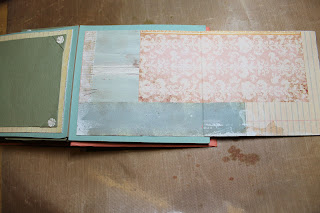
Here's another fun layout. I decided to use the full page size for larger photos. Used some scraps to make photo corners and accented them with those flowers again. But wait....
You can flip open the left side to reveal more space to add photos and/or journaling...
And the same goes for the right side.. Isn't that fun?
And here's the last page... I really wanted to use the birds again at the end. Since this was a pretty large picture so no photo could be added, I decided to just put the photo mat on the back cover instead. I then added the Lawn Fawn banner and added in the word "Friends" inside. The string for the banner was actually from a PTI set.
Here's a close up of the banner and the birds.
So during lunch I shared this mini with the girls and found out I was the only one who brought mine! So I have yet to see what they've created thus far on their minis. I can't wait to see.
So if you go on you tube and watch all the tutorials, they will all tell you how easy it is to put together a paper bag mini... well don't believe them!!! hahahahahaha! Right Kimmie and Mrs. Lum? Seriously... I don't know if I'll ever do one again. I guess I'd better cherish this one!


