Showing posts with label shabby chic. Show all posts

Tuesday, August 19, 2014

Altered Violin Shadow Boxes

 Ahhhh, I'm back!  Yes, I know I'm MIA again, but I have been crafting!  Today I have a special project to share with you.  My nieces were flying in from LA and both of them play the violin, so when I saw these from SaCrafter's Zibbet site, I couldn't resist. It was just too perfect a project to make for them.

When you get the kit, it comes with several layers of the outline of the violin and one of the backing.  I wasn't sure if I was going to make it a shaker box or not, so I glued most of the layers together and kept one separate just in case I wanted to put acetate in between.  I'm not a painter, so this is the junkest part for me.


After all the paint was dry, I was finally able to get to the fun part... decorating!  Here's what I came up with...


My two nieces regularly compete in violin competitions.  I've never seen one before, but my family sends me pictures.  This year, both girls won in their competitions!  Yay! I decided to use their pictures in the shadow box to personalize it for them.

 My younger niece is a very wise girl.  She is very self confident and very intuitive.  I love those qualities about her, so I chose to use a stamp I got from Michael's that says "Be Yourself, nobody does it better".  I think that really fits her personality!


As girls can get picky, I wasn't sure what color my niece preferred, so I decided to go with a pastel theme and just picked all different pastel Wild Orchid Crafts and Prima flowers for my project.  The background paper is from one of my Tilda paper stacks.  I had to trace the violin shape onto the paper to make sure it would fit inside.


On the side of the violin, I added some flowers and a little bird.  Love it!

This photo was actually from last year's competition. The photo they sent me from this year's didn't look right, so I decided to use last year's photo.


Here's a better look at that sentiment.


Oh.. and I made a heart using the heather flowers from WOC.  Love it!


And finally getting around to using some of my Prima charms.  Hard to let go of, but happy its going on a project that hopefully the girls will keep for years to come.


The second project to share was for my older niece.  I thought she still liked blue, but I guess I was wrong.  Found out she likes purple now.  I'm sure that will change in a few months.


For my older niece, she needs a little more encouragement than her sister, so I chose this sentiment from a Stampin Up set I purchased recently.. just for this stamp!  I love this sentiment!


And I used another charm on this one too.  Went with the bird one this time.


Here's a closer look at the flowers I used.  Again from WOC and Prima.


Added a blue bird to the flower cluster...


Hope you liked my projects!  I gave them their violins this past weekend and they seemed to really like it.  Will post another project soon. Hopefully I won't be MIA as much as I have been.

Sunday, April 6, 2014

Hoard Vault Swap with Scrapstress

Hello Peeps!  Just wanted to share a swap that I did with my new friend Rina "Scrapstress"!  Let's just say that I was kinda intimidated to swap with this girl since she does awesome work!  Lfundoo doesn't make me feel any better by scaring me with her comments after she saw Rina's project for me.  Yikes!  Hope she likes what I made for her! (Biting my nails).

Well, it's too late now right?  If she really hates it, she can peel off the name and re-gift it to someone. Bwahahahaha!  So speaking of peeling off the name... check it out...


Did you notice?  Well, Lfundoo did when I showed her a sneak peek at my project.  That's what I get for working on it when I'm sleep deprived.  How embarrassing it would be to have given this version to her!

So I fixed it by adding in the missing "s".  Good thing I had Linda proof read it for me.  LOL!


So I started with a suitcase looking box I found at Ross.  You can get some inexpensive boxes there and alter them- cheaper than using real wood boxes and it comes with the hardware!  First thing I did was paint the box. I hate painting... want to just get to the part of decorating it, but Rina told me to relax and enjoy the process.  Is she kidding?  LOL!


After I finished painting it, I had to figure out what I was gonna do.  At first I was going to use my sprays on it, but didn't want to mess it up.  So I opted for covering it with paper instead.  Used some of my shabby fence paper- I think its by Kaisercraft.  Love. this. paper!

After I got the paper on, went through my stash of flowers and picked out a bunch in pink, celery green and white.  We asked each other about preferred color scheme and this is what Rina said she likes.


After putting on the flowers,  I felt like the top left corner was too bare, so I added on a banner using some seam binding.  The banner was punched with my new SU banner punch and Prima Princess papers.  Added one of my rhinestone butterflies from my Downtown LA haul.


Then it was time to decorate the sides.  I was a bit unsure how to proceed because if I used dangling lace, it would interfere with opening and closing of the box.  So I decided it was time to bling the heck out of my project by using this beautiful trim I got from Aarti from One Little Dreamer.  Love it!  Not sure why, but this trim just screams "Rina" to me!


Now the inside doesn't totally match the outside, but I filled the box with some goodies.  We agreed that the only goodies we could buy was non craft related. If we added in crafty stuff, would have to be from our stash.


Oh.. almost forgot to show you the pocket!  This was the first time I made a pocket. Hope it is secured ok.  I used some of the lace on a roll that I have and glued it to the inside cover.  Added some white trim I got in DTLA and then some sweetheart flowers from my stash.


Ok peoples... wish me luck.. hopefully Rina likes what I made!

Sunday, March 30, 2014

Sister Stamps Happy Meals- Inspired by Bona

Happy Meals are not just for kids right?  Well, I was watching one of my favorite You Tube Channels- Live Love Scrap by Bona (Hi Bona!).  She made these amazingly cute Happy Meal boxes and decorated them to give away.  Although she made them awhile ago, I filed it in my brain to eventually return to that tutorial so I could do my own take on it.  Here's the link to her amazing tutorial...  It's super easy to follow.
 
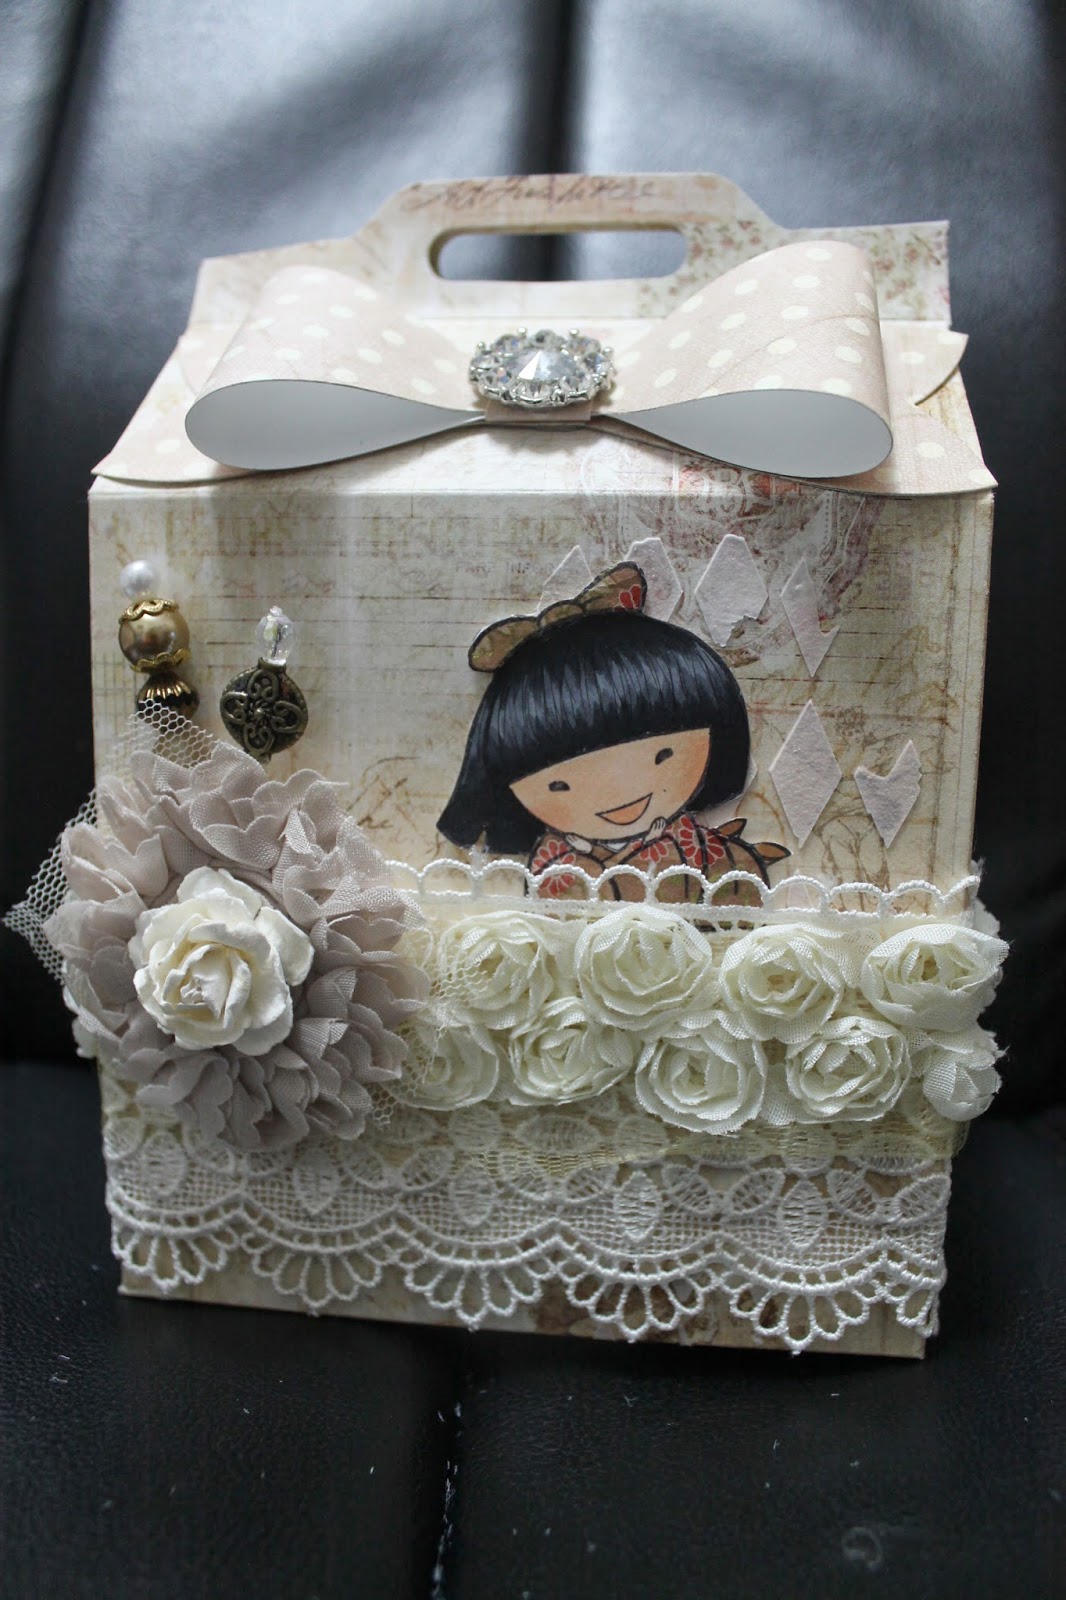
Since I was meeting up with some of my besties in Honolulu, I decided to make some of these Happy Meal boxes for them.  At first I wanted to use my new Prima Doll stamps, but those girls were just too big, so I resorted back to Sister Stamps.  I really wanted a vintage/shabby chic feel to it, so I went with my instinct and here's the end results...
 
All three were made using the new Prima Princess Collection paper line.  Used a variety of lace and embellishments.  Some I made (stick pins) and some were purchased.  The large bow on the top of the box was made using the Stampin up bow die. (Love that die!)  And because the recipients would appreciate the project, I decided to splurge and use some of my beloved bling that is saved for special people who will not just throw my project away!
 
I gave this one to Kyoko.  Added some home made stick pins for balance.


This one went to Linda... Used my new banner punch by Stampin up... Love it!


It's hard to see but I cut out the cupcake and replaced it with a heart embellishment.


And this last one was for Cami.  Used Minako cause she reminds me of Cami.  See the hamburger box on the side?  I ended up not giving it to them. Had so much issues with it. Instead I cut out the mini milk carton die and put that inside instead.


Hope you enjoyed my projects!  And thank you to Kyoko, Cami and Linda for a fun day at The Scrapper's Den and lunch!  I can't wait till we meet up again next month!

Saturday, March 29, 2014

Tulle Flowers- Inspired by TooTooAmy

If you haven't checked out TooTooAmy's You Tube channel, you really should.  She has pretty awesome ideas and tutorials that are easy to follow.  Thanks Amy!!
 
One of the project she shared was pretty tulle flowers.  Here's the link to her tutorial...  Now you have something to make with all that tulle!
 
 
I decided to give it a shot since it seemed pretty easy to make.  Here's the three flowers I came up with...
 

The first flower was made by using some shabby flowers from my stash and then I glued a Martha Stewart paper flower on top.


This next one is my favorite.  I cut up some doily trim and glued it to the center.  Then added on an resin rose that I've had for awhile but have never been able to find the right project to use it on.


And lastly, I got one of my lavender shabbies and layered it with one of the flower pearl hair pins that I got from Downtown LA.  See Lfundoo!?  I'm using my stuff I bought on our trip!


These flowers were made for some special ladies I met up with on my trip home.  Will share more on that in my next post.

Friday, March 28, 2014

Craft Fair Projects Inspired by Creative Young Mama

 
On my Epic Crafty Adventure with Lfundoo, I was fortune enough to meet up with a bunch of YouTube crafty ladies and had a blast getting to know them.  One of them is known as Creative Young Mama (Hi Marisa!).  She made some hand scrub and decorated mason jars to store it in and gave them to us.  Her project was so pretty, I was inspired to try it out myself.  Check out her project here..
 
 
In Feburary, there was a small craft fair that my friend asked me if I wanted to sell anything.  I wanted to see if there was any interest, so I decided to make a few of the hand scrub that Marisa made and also tried out a lemon body scrub.  You can find many recipes on You Tube. I had a lot of fun decorating these small mason jars.


Surprisingly, they sold pretty well.  Maybe I'll make some more for my next craft fair.

Saturday, February 15, 2014

Epic Adventure Mini- Part 3

Phew!  We made it to the end of the birthday posts for Lfundoo's birthday presents.  I decided to make her a mini album to commemorate our epic adventure.  That trip was sooooo much fun that I just had to incorporate it into her gift.  I saw post an envelope mini using legal sized envelopes and I was very intrigued by it!  I've seen other envelope minis before, but I really liked the long look of this mini, so here's what I came up with... first up is the cover.  I couldn't resist titling it "Epic" like our adventure.  Used some of my scrabble tiles from my vault.  That lace is from my trip and so is that sheer flower and camera and plan resin pieces.  I really like that set and wish I bought one more of it.  The trim on top of the lace is hard to see, but it looks like mini acrylic leaves.  Got that trim from One Little Dreamer on Zibbet.


See the camera resin?  I also added a few of the say it in crystals from our Prima classes.  I hope I can get my hands on more of these soon!


Ok we finally made it to the inside- yay!  Here's what it looks like when you open it up.


The title page was fun to mix alphas, stamps, and pearl embellishments.  


Page 2 is of our first day in Downtown LA and dinner with Ohaijoy.


Page three is of our 2nd day in Downtown LA and shopping at Tamaya and dinner with Fumi.


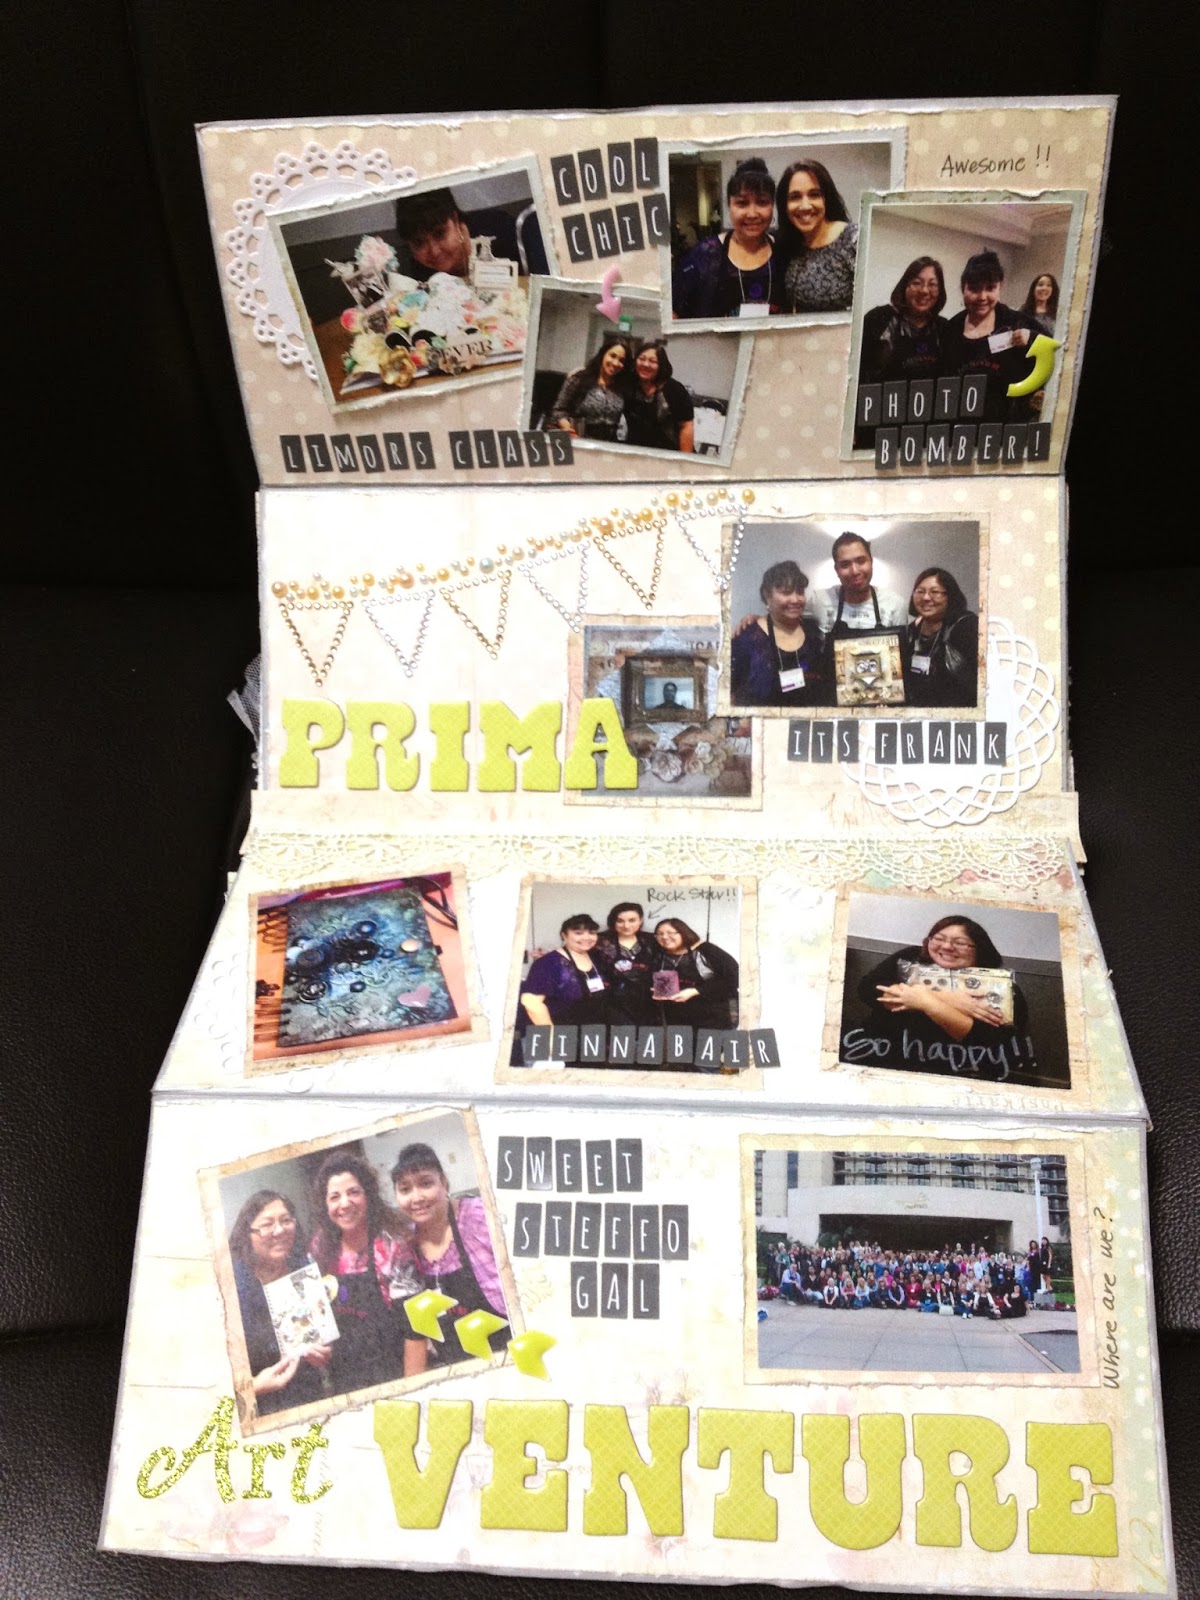
The middle section is all about Prima baby!


Panel 1 is of Limor's class.  I decided to do them in the order of our class schedule.


Next was Frank's class.


Then the Rock Star- Finnabair!


And then sweet Steph!

Turn the next page and it has more Prima and other fun stuff.


First page is Nathalie!


Then Jamie and Scrap Ninja- Sherry!


The next pages are all about shopping at the Prima Warehouse!


And Linda met up with the Scrapstress later that night.


Then our other favorite part of the trip... our meet and greet with Creative Young Mama and Scrapstress!  Too bad Ohaijoy couldn't make it, but we managed to facetime with Nadinetx!


Lucky Rina was taking photos of our day!  I had to use her photos cause I didn't take much.  Had too much fun I kept forgetting!


Hi Nadine!


And the back cover was our trip home...


What an epic adventure.  Still going through withdrawals!  Hope you had a great birthday Linda! Hope you enjoy the gifts!