Showing posts with label Tutorial. Show all posts

Sunday, May 9, 2010

Large Tote Bag Tutorial

Hi Everyone! By special request, I'm posting the instructions/measurements for the Large Tote Bag. Its based on the original design on the Scor-Pal website for the mini tote bag. I just adjusted the size so that it uses 2 sheets of 12x12 cardstock instead of 2 sheets of 6x6 cardstock. It looks like the size of a regular gift bag you can get in the store... only you can choose what DP you want to use! I guess you can consider this my Mother's Day present to you! Supplies:
  • 2 sheets 12x12 cardstock (same print)
  • Ribbon 2 strips of 18"
Tools:
  • Scoreboard
  • Paper trimmer
  • hole punch
Directions:
  1. Score each sheet at 1/2", 2 1/2", and 4 1/2". Make sure if your paper has a right/wrong direction that your paper is facing right side up at this first step. Note, if you need a wider bag, you'll have to adjust the space in between each score.
  2. Turn paper 90 degrees to the left, and score at 2 1/2". This will be the bottom of your bag.
  3. Turn your paper so that the bottom of the bag is at the bottom. Cut out corner scored rectangle from lower left corner.

4. Cut on 4 1/2" score line from bottom of bag to the 2 1/2" score line that you made in #2. These will be the flaps for the bottom of your bag.

5. Now score the top of your bag at 1/2". Fold on score line and adhere down.

6. Line up the bag as shown. Punch holes for handles approximately 2" in from the edge of the bag and about 1 1/2" down from the top of your bag. Make sure the paper is aligned with the two tops and two bottoms together.

      Punched holes at top of bag. I used my yellow crop-a-dile since it has a far reach. You could also measure and pierce it with your paper piercer.

    7. Adhere sides of bag together to form bag. Close bottom of bag using double stick tape.

    Bottom of the bag... 8. Tie a knot in your ribbon so that it won't pass through the hole. Insert ribbon from inside of bag and trim off excess. Insert ribbon back into bag through other hole and determine how long you want the handle to be. Tie off knot and trim excess. Repeat on the other side. Stick ribbon back in the other hole... Measure handles so that they are the same length before you tie the knot on the inside. Hope you enjoyed this tutorial! Let me know if you have any questions

    Tuesday, November 3, 2009

    Embossing Folder Tutorial

    Hi Kris and Tammy! This one is for you! I guess we were the last 3 who didn't know how to do this! So, I finally figured out how to expand the use of my embossing folders! Granted, this will only work on certain folders, so keep this in mind before trying it out. I recommend folders that have a pattern to them. This is important since you will need to follow the indentation after you first run it through your machine. For this tutorial, I used a 5x5 sheet of cardstock. The average size of an embossing folder is A2 size. I don't think it would work if your paper was oversized both length and width. If you figure out how to do it, let me know. 1. Place paper flush against one edge- I made mine flush left. This will get your embossing all the way to the edge of the paper.
    2. Run it through your Sizzix Big Shot machine as you normally would. I use the multi-purpose platform on tab 1 in between my 2 cutting plates. Your paper will now look like this.. See how the right hand side of the paper is not embossed?
    3. Move the paper so that the right edge will now be in the folder. Using the grooves (in this case dots) as your guide, stick the paper into another set of holes. All the dots on your paper should line up perfectly for this folder... again not sure how it will work in folders with different patterns.
    4. Run it sideways through your big shot (yes, I have an old version of the big shot!). The side that was not embossed yet should be the side that goes into the machine first. In my case, the right side of the folder.
    5. Sorry, couldn't really "show" you here, but hopefully I can explain so that you can understand... run through the machine enough so that it will emboss the area that was not initially embossed, then run the machine back the way it came from (i.e. turn the handle the other way). If you ran it all the way through, it will likely flatten the dots sticking out of the folder and you will be like me and get very frustrated!.. so remember, only go about 1/2 way and then back. (Don't look at my very used cutting plates! Note to self... need to buy new ones!)
    Ta Daaaaaa! Now your cardstock is embossed all the way! Woo hoo!
    Hopefully this will be informational to more of you out there!

    Saturday, July 11, 2009

    Magic Card (adapted) Tutorial

    As requested, here's the tutorial of my version of the Magic Card (adapted by me). It was adapted from the instructions posted on Split Coast Stampers. I had problems following their instructions, so I made some adjustments and it works better for me.. hope it helps you!
    Supplies:
    One 4 1/4” by 5 1/2” cardstock– card base (you can also replace with an A2 card so it will open)
    · One 8 1/2” x 10 1/2” for cover (if using patterned paper cut 8 1/2” side facing up; 10 1/2” side should be facing sideways)
    · One 3 1/2” x 5 1/2” white cardstock– for colored image.
    · One 4” x 5 1/4” piece of white cardstock (backing for non-colored picture). Note- I've found that I've had to trim this down a little so you may have to too.
    · 1 sheet of Acetate (~ 4 1/2 “ x 6 1/2”- allow room for trimming).
    · One 1/2” x 3” of cardstock– for top of image.
    · Ribbon
    · Paper flowers, flourishes, crystals, Stickles (all optional) Tools:
    · Stamp– The Greeting Farm images are recommended because of their size. Try to use line stamps (not those that are filled in).
    · Stamp– Greeting (optional)
    · Paper cutter
    · Score blade or bone folder
    · Markers or color pencils
    · Double stick tape
    · Scissors
    · Staz On black in pad
    · Spellbinders Oval dies- you can try using different Spellbinders shapes.
    · Hole punch (1/8”)
    · Circle Punch
    · Sizzix Big Shot
    Instructions: 1. Score your 8 1/2” x 10 1/2” cardstock horizontally at 5 1/4”.
    2. Reposition cardstock vertically and score it at 4 1/4”. You should now have 4 panels.
    3. Change to a cutting blade and cut out upper left panel.
    4. Cut off 1/4” off the long side of the right panels.
    5. Cut on score line between the right side panels leaving 1/2” on each side. (hint: If you turn the paper horizontally, start cut at 1/2” and end at 3 1/2”. Hope you can see where I cut on the score line.
    Put piece aside for now and work on stamped image.
    6. Using 3 1/2” x 5 1/2” of white cardstock, stamp image ensuring at least 1/4” on each side and at least 1/2” from bottom. Try to center image as much as possible.
    7. Color image as desired.
    Note: You could stamp a sentiment here if you want to. I normally wait till the card is almost done so I can see if I have enough room for the words.
    8. Lay acetate over image and try to center it– leaving space to trim acetate.. Note: if you are a good stamper, you could probably use a smaller piece of acetate, but I leave room so I can trim.
    9. Stamp image using Staz On black ink. Don't laugh at my stamping... I didn't re-do it because I just wanted to make this tutorial! Normally, I would have re-done it. I put it on blue so you could see that it was stamped on the acetate.
    10. Adjust acetate so that it lines up perfectly with colored image. Using double stick tape, adhere acetate to the top of the image so that it lines up perfectly.
    Its hard to see but this photo shows the double stick tape at the very top of the cardstock.
    I start lining it up from the bottom of the image and work your way up so that you don't accidently get the acetate stuck to the image in the wrong place. You should have excess acetate over the cardstock.
    11. Trim excess acetate so that it is the same size as the cardstock.
    12. Carefully trim off 1/4” from each side of image keeping 1/2” at the bottom. (hint: at 1/4”, trim up to 5” from top- stop at 5").
    13. Now, trim off the strips you just cut. You should have a tab at the bottom of the image. Cut off the tab from the ACETATE ONLY. Keep the tab on the cardstock.
    If you look closely, you can see that I just cut off the acetate tabs and not the cardstock. If you cut the cardstock tab, your slider will not stay in the card! This photo isn't that good I know... Sorry!
    14. Take 1/2” x 3” cardstock and score at 1/4” (in half the long way).
    15. Using double stick tape, adhere to the top of the image/acetate piece so that it covers both.
    16. Get card cover piece and fold top right panel down, so that there are 2 panels (side by side).
    start with this...
    end up like this

    17. Get the card cover piece and on the left panel, line up stamped image to the bottom of the card. Center image.

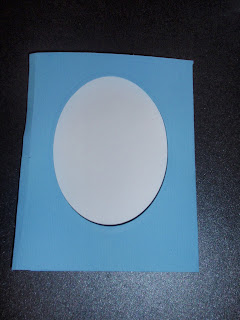
    18. While holding the image in the center, get the largest oval Spellbinder’s die and center over the stamped image.
    19. Carefully remove the image while holding the oval die in place. This is the only way I could figure out how to cut the hole where I wanted it!

    20. Cut oval using Sizzix Big Shot Machine. Re- measure to see if you cut it correctly.

    21. Adhere white 4” x 5 1/4” cardstock to the back piece (piece w/oval cut from it will go over this piece.

    22. Punch a 1/2 circle for the tab at the top of the card cover.

    23. Carefully insert the card from the bottom. This photo shows where the slider should go.

    There are 2 pockets that you can slip it in– it should go in the back pocket.
    26. Pull image up from the top of the card through hole on the top– card should not be able to pull completely out from the pocket.
    27. Carefully pull out the acetate sheet only and insert it into the front pocket (where oval window was cut).

    28. Test mechanism to see if when you pull out image from top if it appears colored.

    29. Punch a hole at the top center and attach ribbon.

    30. Fold excess cardstock of card cover over the card so that it closes it in the back. Tape card cover closed. You could score the excess piece at ~ 1/4" but sometimes the cardstock is too thick and it won't close well.
    31. Adhere card cover to card base.

    32. Your card is almost complete! Just embellish as desired.

    I'd love to see what you do with this card! The possibilities are endless! Have fun!