Showing posts with label Tags. Show all posts

Tuesday, April 29, 2014

Prima Doll Tag Swap

 I've been waiting to share this post for awhile now!  The last time I went home, I was able to meet up with my besties for a haul session at the Scrapper's Den.  (Hi Rose!)  If you haven't been to Rose's yet, she carries a lot of Prima, Grapic 45, Maja Designs, and other hard to find products.

After our outing, we all decided we should really use what we already have... (yes, that is the recurring theme), so we decided to motivate us, we'd do a swap.  Since we are all into the Prima Dolls right now, we decided that we'd do a Prima Doll tag swap.

Each of us had to add a requirement to the swap.. Here's what was required... Prima Doll, tag, stencil w/paste, butterfly, pearls/pearl trim, lace, stickpin, mini dangling charm... Phew!  That was a lot to remember!  I had to actually keep referring back to the list each time I made one.

As with any type of project, its much easier to mass produce.  If you know me, you know I get bored really easily, so although I used the same doll stamp and basic layout, I decided to change up the print/color of each tag.  Here's all the tags I made.  The one in the middle was not part of the swap so it won't have all the same components listed above.


Each tag used was from one of the tag pads by Prima.  First I stamped each doll on the tags that only had faint script writing on them.  Since the color is like a buff, it was close enough to skin tone for me.  Plus those tags are pretty sturdy, so I thought it would make a good foundation for each doll.

Then I chose each background tag I wanted to use, then picked out their "dress" paper to match.  Gonna try my best to remember which line, but most are by Prima.  This first girl is wearing paper by Prima from the Tea Thyme collection.  Love that collection!  It's great too since the dress will fit on the 6x6 paper pads that have been gathering dust in my craft room.


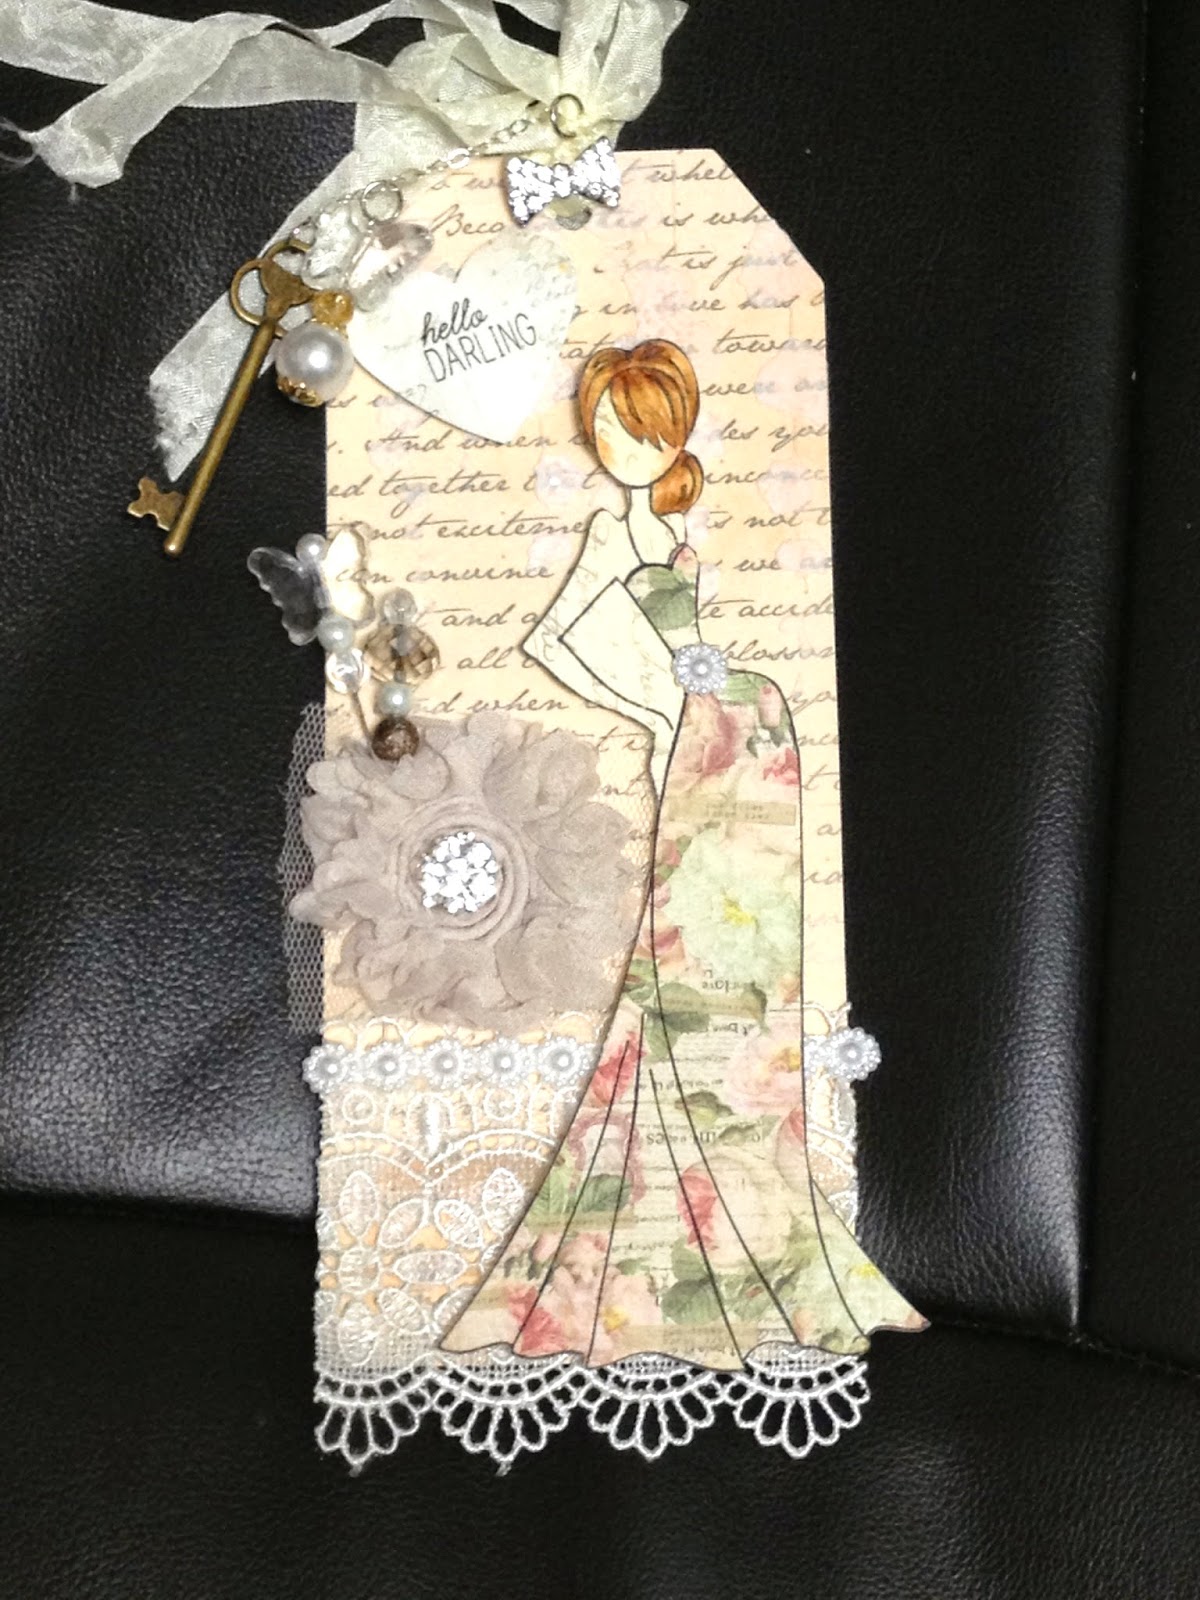
To color their hair, I used my copics, but you could easily paper piece that too.  You can see in the next photo that I added one of the pearls from the pearl trim to her waste line.  You can also see the paste and stencil I used on the background.  After I pasted it, I added some chunky glitter that's hard to see in this photo.


After digging around in my stash, I found this cute Hello Darling sentiment in one of my Mama Elephant sets.  I thought it matched nicely!


Here's a shot of the lace trim I used.  I must say, this is a great way to use up your scraps!  I didn't have any scraps, but I'll be saving mine from now.  Over the lace, I added some pearl trim and a shabby flower with some bling.


Here you can see the stickpins I made. I actually made these a long time ago and keep them available so that whenever I do need them, its ready to go.  For some reason, I think it looks better when you use 2 stick pins instead of just one, so I added in two into the flower.  One of the stickpins has a butterfly.


Not sure why this photo is coming in sideways, but you get the idea.. it shows my dangle charm I attempted to make.  Started with a key and attached it to a chain.. Then decided to try make another charm and used a large pearl, bead, and another butterfly.  I used seam binding for the ribbon at the top and attached my charm to that.  Over the seam binding, I glued on a blow earing I got from DTLA.


Tag #2 was in a shabbier color scheme.  Its a very pale pink but more like a nude pink?  Anyway, you get the idea.  Unfortunately, the doll covered up the pretty rose print on the tag, but I tried to have some peek through anyway.


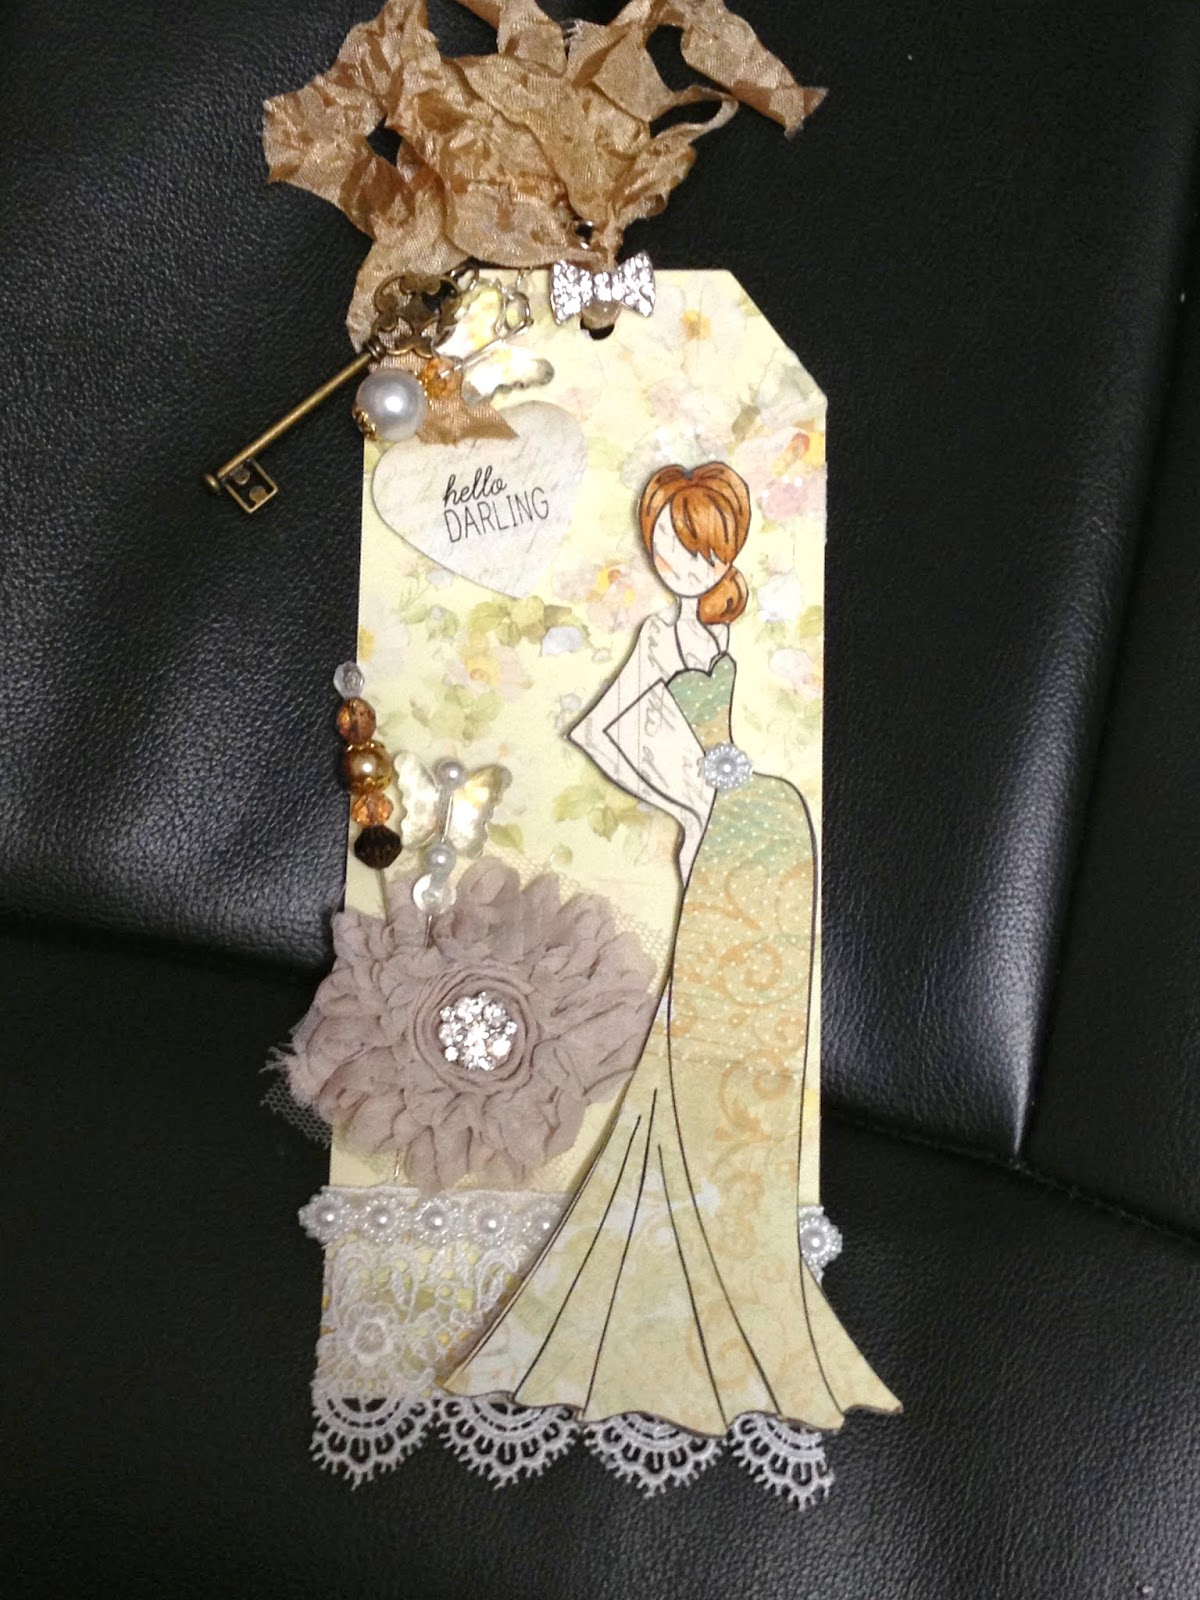
Tag #3 was in the pale yellow color scheme.


Tag #4 is another pink shabby tag... I think this is my fave.


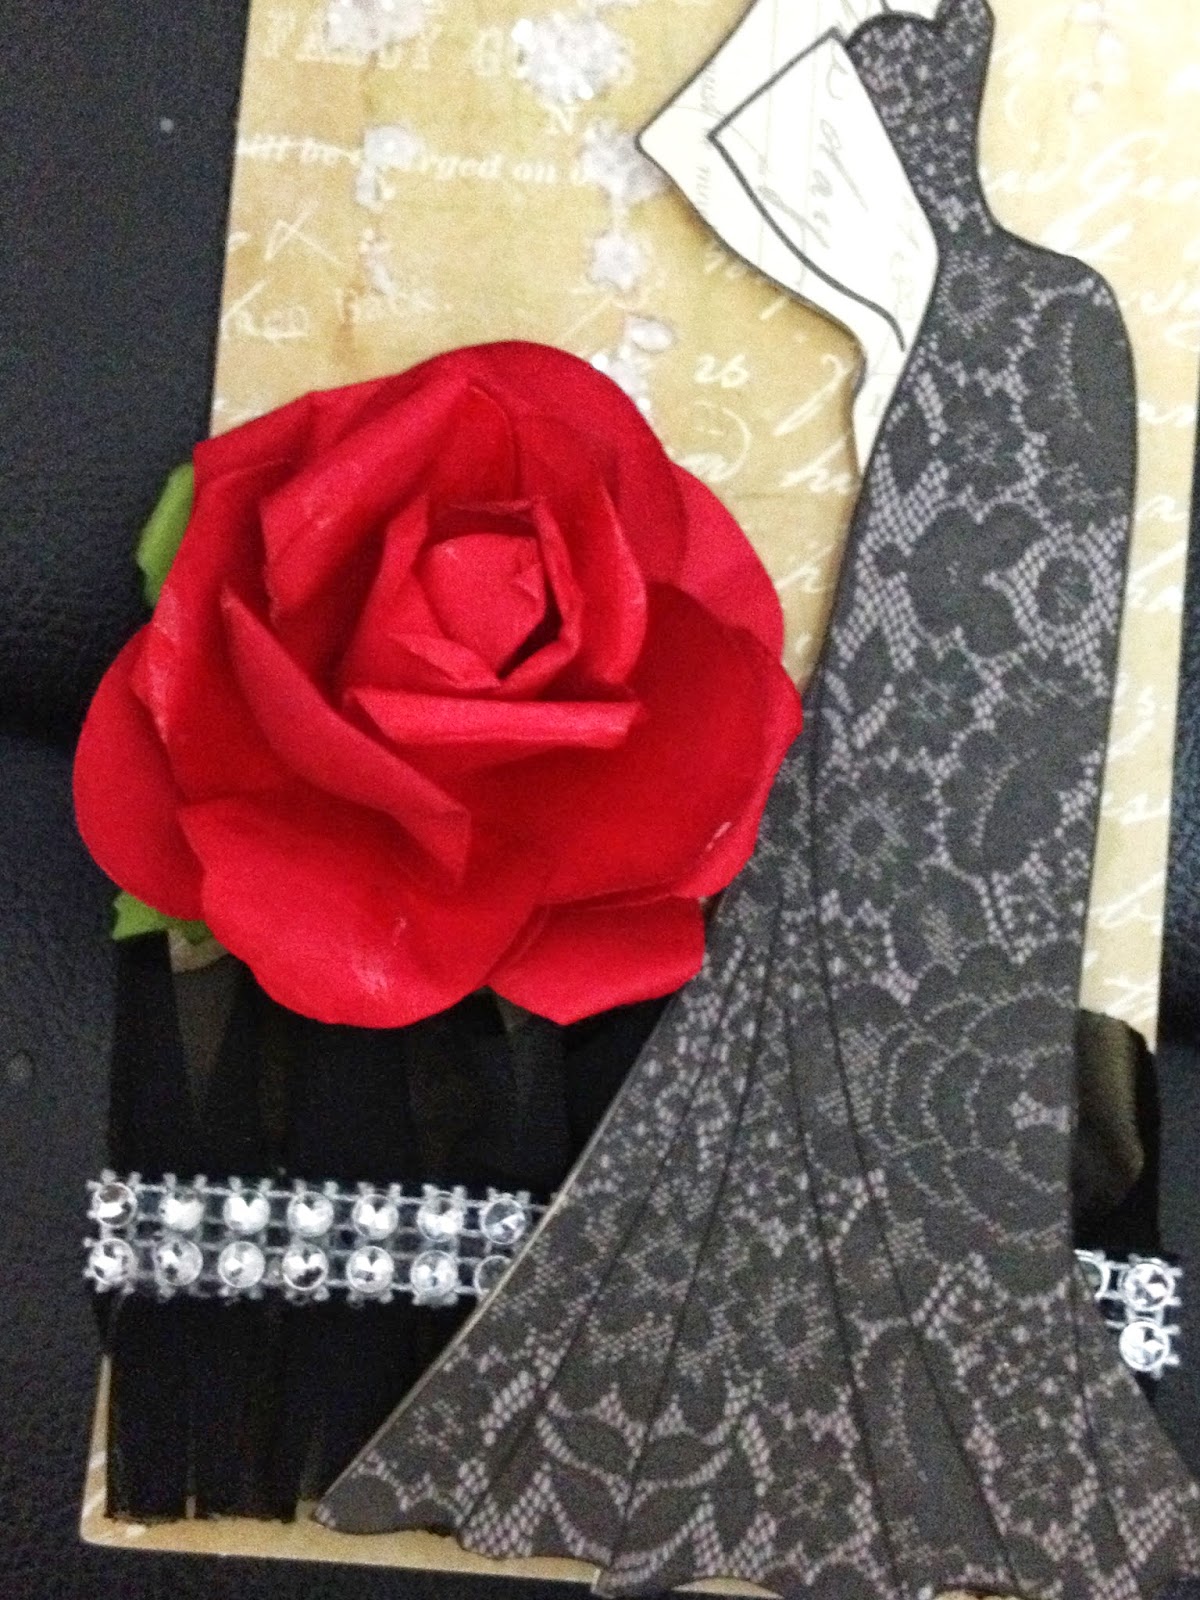
And finally, tag #5 was not part of the swap, but I wanted to share it anyway.  I guess I was getting a little tired of all that pale colors, so I decided to add some red to my project. You notice, no pearls, stick pins, or charms.


Ok folks, hope you liked my tag swap projects!  I'll share the other tags once I get my hands on them so you can see what my besties came up with!  This was so much fun!!!  I encourage you to join a project swap too!

Monday, April 28, 2014

My First Prima Doll Tag!

Aaaaahhh, yes. I did join the bandwagon here!  Ok I'll be the first to admit that I wasn't into these Prima Doll stamps by Julie Nutting when I first saw them. I actually didn't quite understand their appeal since they didn't have faces.  But after seeing them over and over on YouTube and seeing all the amazing projects crafters were making with them, I started becoming fond of them by the time I went to Prima ArtVenture and bought one from the store.

Then after I got back, it happened.  Yes. I got hit by the Prima Doll bug.  I guess since I was late to the party, so I got some good deals on the older doll stamps, but like everyone else, I also got some of the new ones too.  Now I won't say I need to have all of them, because I don't. I only bought the ones I really liked.  This one is one of them!  I think her name is Tasha.


So I am doing a swap with my friends because we all vowed we need to start using our stuff, so thought this would be a productive way to encourage us to create with our stash and inspire each other in the process.  I'm trying to make some extras nowadays since its much easier to mass produce than to bust everything out again.  So this tag was not meant for the swap with the girls, but I did end up giving it to a new friend that I met when we went to LA.. 

Rina "Scrapstress" and I met in LA on Lfundoo and my Epic Crafty Adventure. She's a riot and a totally hip chickee... So we got to chatting and decided to do a swap.. which you will probably find out about in another post because I can't share this tag until my other friends get their tags since it's kinda similar.
Anyway, nuff of the confusing stuff.  This tag was not part of the swap, but I wanted to make her one anyway because we were chatting about the Prima Dolls.  We both caved and bought some and I'm dying to see what she comes up with! (Pls share your Prima Doll projects Rina!)

So I started off by using some modeling paste with my favorite Prima stencil. It looks beautiful hanging down in the background.  I also added some chunky glitter to it to give it some shimmer.  Hard to see the glitter in the photos... sorry!


The paper used on the dress was from the Prima Stationer's Desk collection which I'm totally in love with!  Guess I needed a change from all those shabby chic pastels.  Had to add some flowers too.  You can't tell from this shot, but there's that ruffled chiffon trim from Hobby Lobby at the bottom of the card and some heart rhinestone trim over it.


And can't forget the top of the card... I used some rhinestone trim and red sheer ribbon to hold it in place. Then glued down a red rose on the bow.


The finishing touch was to add some long stem roses to her hand.


Hope Rina likes it and the other goodies we swapped!

Monday, October 28, 2013

Christmas Tags Class

Every year, I normally teach a Christmas class of some sorts.  Sometimes I do a whole series of Christmas classes and sometimes it's just one class.  This year, I was only able to do two classes but they were a total of 12 different tags.  I still need to take photos from the first tag class, but I managed to remember to take photos from today's class.

Here's a pix of the 6 we did today...


This first tag was on my mind for quite some time.. I guess you could say it was the inspiration of the class!  Although not illustrated here, you can tie the ends of the banner to a gift bag and let it hang.  You can make it larger or smaller by adding more banners. I used an EK success triangle punch, but there are several companies that make banner punches or dies now.  The letters shown here are by PTI, but in class we used the alphabet dies by Lawn Fawn.  Background paper is by Doodlebug.


This second tag was a last minute change from what was originally submitted.  I really wanted to introduce Inka Gold to the class to see if they liked it. They had a great time trying out the new product and looking at all the color options.  All of the snowflakes were old Martha Stewart punches.  The snowflake border is a memory box die. Added some crystals for embellishments and more bling.


This next tag was the last tag I worked on.  I stayed up pretty late and made more modifications this morning until I was satisfied with it.  Decided to use the new Mama Elephant stamps.  So happy the store now carries Mama Elephant!  I've been waiting for this set for almost a year!  Used the polariod stamp from an old Lawn Fawn set as the base of the tag.  Then aligned the deer from Mama Elephant and speech bubble from Lawn Fawn and stamped it together.  Then stamped the No Peeking sentiment that is also part of the Mama Elephant set.  The Merry Christmas sentiment is by Island Scrapbooking and fits perfectly on the bottom of the polaroid.  Topped it off with a bow.


I think this is my favorite tag of the set.  This was inspired by the cupcake picks you see all over the internet.  By using a BBQ skewer, you can stick the stick into any gift bag and let it pop out!  Love it!  I cut up the flags using a 2 1/2" x 7" strip of Doodlebug paper.  Then folded it around the skewere and taped it together.  You flag will look like a rectangle, but then you cut the points to make it look like a banner.  You can adjust the size of your flag depending on what you want to put on it, but I think this size came out pretty good for a gift bag.  The Santa was actually punched from the back of the scrap paper of the flag.  I used a 1" punch to punch out Santa and then a 1 1/4" white circle behind it.  Finally mounted both on a 1 3/4" scallop circle.

To secure the ribbon/baker's twine so that it doesn't keep falling off, I punched a tiny hole next to the stick on the top of the flag.  Then threaded the ribbon/baker's twine through it before tying a bow.


One of the other tags I wanted to do included a clothes pin.  I thought it would be fun to use the clothespin as an accessory to the tag, but it can also be functional to clip the tag to your gift!

Used a Memory Box tag die as the base out of kraft cardstock.  The holly border die is also by Memory Box- can you tell it's one of my favorite die companies?

The sentiment was from a Paper Smooches set, which was embossed in white to look like icing.  The mini gingerbread man is another Island Scrapbooking laser cut. Topped it off with some red pearls to look like the holly berries.

The clothespin was made by covering each side with 1/4" strip of designer paper. Then I punched a heart using an old Martha Stewart punch and added PTI button and tiny bow.  I thought this would be cute to put on some baked goods for my neighbors or work place.


My last tag was made using the envelope punch board.  If you haven't picked this up yet, you need to.  There are so many amazing projects circulating out there and new ideas are cropping up every day!  I'm amazed how much this new tool has changed how we make paper projects!

This project was inspired by the mini treat holder that is circulating on the internet.  It's meant to hold a mini candy bar and many people are using it for Halloween projects.  Since we often give candy canes at Christmas, I thought I'd adjust it a bit to fit a candy cane or money that you can then hang from a gift bag.

The dimensions are 7 1/2" x 7 1/2" cardstock and punch/score starting at the 2 5/8" mark. Then rotate and line up with the score guide and punch/score again.  After adhering it down, you will get something that looks like this.


I used the Season's Tweeting's stamp set by Lawn Fawn, a Spellbinders heart die and the Memory Box branch die to decorate.

We had a great time in class!  Need to finish up one more class next Saturday then its craft fair prep time!