Saturday, September 1, 2012

Surprise Birthday Blog Hop!

Today we are celebrating Leanne's birthday by throwing a fun birthday blog hop party!  We thought we'd gather a few of her friends and design team members to celebrate her special day.  If you came here from Danni’s blog you are in the right place.  If you didn’t you may want to start at the beginning at Yumi & Fumi's Handmade Crafts blog

I met Leanne through blogland- mainly because she is so nice and leaves comments on almost all my posts!  So sweet!  I was fortunate enough to meet her in person too!  I heard she was going to the Winter CHA and thought I'd try to meet up with her then.  I'm so glad we were able to meet in person.  Leanne has been a blessing to Sister Stamps too.  Not only was she one of our guest designers, but she frequently posts Sister Stamps cards for her Lilo's Fun Friday posts!  I can't thank her enough for all the publicity she's given Sister Stamps over the past year.  Thanks Leanne!  You are such a sweetie!  Hopefully we will cross paths again one day and have time to hang out.

Sooo Leanne...  Are you surprised that I participated?  Ha ha ha ha ha!  I know you are! OK enough talking... on to the card!

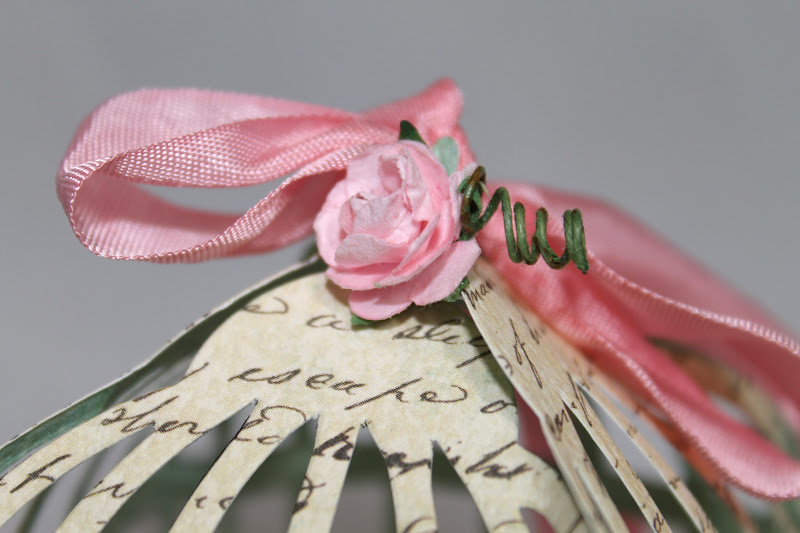
I gotta admit, this is my 2nd try.  I guess I'm out of practice!  I decided to use Mariko since she is holding a gift- perfect for birthdays...  Since I'm still into the shabby chic theme, I decided to try incorporate it but using brighter colors.  I turned to my new 6x6 American Crafts DP for the flag paper and drew my colors from that pallet.  


 I found a heart doily from my stash and decided to use that in my background.  Stamped "Surprise" from my new Penny Black birthday set (love that by the way).  Used a crystal flourish and a variety of flowers by I am Roses and Wild Orchid Crafts.  The smaller acrylic flowers are by Dress Me Up buttons.  Here's a better look at Mariko.


Just wanted to share my shabby style here... Inserted into the large white rose is actually a stick pin I made.  Can you even see it?  There's a bunch of beads under the rose.  Stick pins are my new favoritte embellishment.


Thanks to Eva for helping coordinate this surprise hop!  And Happy Birthday Leanne! Tanjyoobi Omedeto Gozaimasu!   Go have a good time girl!  Now you are off to see Kathy from Pixie Boutique!  Be sure to end at Leanne's personal blog to wish her a Happy Birthday!!

Thanks for coming!  


Tuesday, August 28, 2012

Stamp Camp #3- Coming Soon

Still trying to catch my breath from a couple of crazy weekends, trips home, and getting ready for Sister Stamps Release #9.  In between all the chaos, I managed to make a class sample for an upcoming class I'll be teaching with Debi.. on Saturday, Sept 8th all day.  You've seen this same birdcage ornament I made earlier in a shabby chic theme.  Decided to go with more traditional Christmas colors this time, so I had to change up some of the supplies.  Ended up using some DP with no words, so I stamped them myself using an old Hero Arts background stamp.  I liked the look of the last paper I used, but the background was aqua, so I went with something that was more neutral. 


Cut the birdy up using red cardstock and stamped his breast using another old Hero Arts heart flourish clear stamp in gold.  Inside the cage, I cut a pinecone using my Tim Holtz tattered pinecone die (finally!)  I totally missed the season last year and bought it in February.  I was happy to get it but never used it till now.  I know you can't tell from the photo but I used gold smooch on the edges and added some gold stickles.  Other goodies in the cage include a pine branch and berries.  I'm thinking of adding an ornament too.  Oh.. almost forgot!  I also put some glue on the bottom of the cage before I put the other goodies down.  Over the glue I added a layer of white flower soft to look like snow. I've ALWAYS wanted to use my white flower soft as snow and I'm finally doing it!  Added some red ribbon to the top to close up the top of the cage.  Topped it off with some double row mesh bling.  It's Christmas after all, so gotta have some bling right?


I think this class might fill up fast, so hurry and sign up if you want to save your spot.  Don't forget to check out the Sister Stamps blog for a chance to win our new images!

Thursday, August 23, 2012

A Cup of Tea

When my sister visited earlier this summer, she went to have tea at Kailua's A Cup of Tea.  She loved it so much, she bought us gift certificates so we could go with the girls.  When my brother visited from the mainland, we decided to take the girls to tea so we could all enjoy the experience together.   Now I've only been to one tea room before so I thought it would be the same experience.  Boy was I wrong!  Maybe it's cause I like the whole Shabby Chic thing now? Not sure, but I absolutely loved the atmosphere at A Cup of Tea!  It was full of Shabby Chic goodness!  Here's some of my favorite things...

This bird was found at the entrance to the tea room.  I love it!  It's pink for one thing, and it has actual feathers!  Wish I could find one for my office...


And what is a tea room without a chandelier?  Reminds me of Debi and Mrs. Lum... except Mrs. Lum's would have feathers and it would be in a birdcage!  LOL!


I thought this teapot lamp was cute and so fitting for a tea room!


I love this! I don't even know what it's called but I want to find one now and decorate it with chandelier crystals!  ha ha ha! I can see my husband cringing already. I'm sure he can't wait till this "phase" passes.


Ok... I totally posed the humming birds, but I couldn't help myself.  I thought they were so cute- they are actually salt & pepper shakers.  Don't I have a pretty teacup?


Mmmmmm, here's the soup of the day- Mushroom!


Yummy- here's the food.  Bottom tier was sandwiches- cucumber & tomato, ham w/aioli (?), and tuna.  Middle tier was cranberry scones and fruit.  Top tier was chocolate cake and orange dreamcicle cupcakes. My brother said they taste like box mix, but I like box mix! I couldn't tell the diff.


Here's the fun part!  Dressing up!  Just before we left, we saw that the side room had a hat stand full of fun hats to wear.  The girls (including Grandma) had fun picking out hats.


Paul couldn't let the girls have all the fun.  He wanted to dress up too.  They decided to make a funny face for this one.  My youngest niece has the best pose.. under the top hat!  She cracks me up.  We think she was probably smiling under the hat too.  ha ha ha!


And we were surprised to meet a fellow blogger at the tea room!  Colleen met my sister in law at the airport of all places.  She was nice enough to offer her help to my sister in law when she needed it.  Then we bumped into her at A Cup of Tea... while she was talking to my sister in law, I recognized her... wasn't sure if she was a blogger or just a local crafter.  I had done so many make 'n takes last month, I wasn't sure if I had met her that way or through blogging.  How weird is that??? To add more weirdness to this story, she was there with another blogger that I DID meet at one of the make 'n takes! Crafters are so nice yah?


I must say I really enjoyed this tea experience!  I would definitely recommend going there again!  On a funny note, my husband really enjoyed this experience as well.  Who would have known?  I think he was skeptical at first, but once the waitress said that if we finished all the sandwiches she would bring more, his eyes lit up... Then after we were almost done eating, she said... "you saved room for ice cream right?"  now my husband was in heaven! Ice cream too?  Even though it was a bit too shabby for his taste, even my not-so-shabby husband had a good time!

Sunday, August 19, 2012

Shabby Parisian?

By the time I made this frame for my friend Cami, I was an expert!  Cami's style is very frilly and feminine with lots of lace and flowers.  Well, I don't have much lace in my collection, so I started out by framing the inside opening with some pearl trim.  After looking at it for awhile, I decided to add the Tim Holtz rosette trim that also came with some elastic ruffled trim and seam binding, which I used on the bird cage ornament.  I decided not to die the rosettes and leave them white.  Since the frame itself was painted pink and the rosettes were white, I decided to add some black and go Parisian!  This was inspired by CreativeKelly4rmCali who has a YouTube channel full of shabby chicness that I can't stop watching!  

So here's a look at the whole frame.  This time I had finished up covering the mini clothespins too, so they made it to the photo.


Cami loves butterflies, so I had to add them in somewhere.  Since I wanted some black but not too much, I decided to cut the butterflies out of black mirrored cardstock- which reminds me of laquer.  I also adhered a black bow to the frame for more black accents.  And each clothespin was covered with some old Doodlebug polka dot paper for more touches of black. I'm glad the black wasn't overpowerful.  Here's a closer look at the embellishments.  Do you like the flower stickpin I stuck in the rose?


The butterfly punch is by Martha Stewart and the roses are by Wild Orchid Crafts and I am Roses.  The buckle and flatback pearl is from Sa Crafters.


This larger butterfly die is by Memorybox dies- my favorite!  And below is the close up of the clothes pins.  I love those acrylic flower accents. I got them from Ben Franklin, but can't remember what the brand was. (Sorry!)


I took this photo to show you the stickpin on the back. This one had a butterfly on it.  And you can see the buckle (ribbon slider) and flatback pearl better here.

Ok last photo.. forgot to mention that I stickled the flowers too for some bling. It's hard to see but its there.

That's all of my shabby projects so far.  I'm hoping by the time you read this I'll have created another one!  Gotta wait to post this till Cami receives it.  Ta ta for now!

Friday, August 17, 2012

More Shabby Goodness!

Can you tell I'm in love with these easel frames?  I wanted to make something Shabby Chic-ish for one of my dim sum gang member- Linda!  She came and helped me and kept me company (a lot) when I had my round of make 'n takes in Honolulu for Sister Stamps.  Thanks Linda!

Linda has been my shabby chic resource.  She fills me in on what the different shabby products are and where to get them.. Yes, she is my enabler and I love her for it!  Now Linda loves the color purple, so I knew I had to incorporate it somehow into the project. I'm not really a purple fan, but I do like lavender, so I went with that.  The chicken wire was "installed" the same way I did Debi's frame.  But instead of the bling, I went with a more girly approach.  Got me more of that flower garland that Cami had given me from Ben Franklin.  This time I got some in purple to match the project.  I love it!  Here's the full view of the frame.


I also added some daisies and roses from I am roses. Love those too! I've been on a shameful flower binge recently... and lovin every moment! OK back to the project... Found this cute purple cardinal at Ben Franklin too.  Isn't he a cutie?!  Had to add him to the frame.


 And thought I'd show you the backside....


Added another birdie so he has a friend!


Well, I'm hoping Linda likes her gift!  I can't wait to hear what she says!  Catch ya later!

Thursday, August 16, 2012

Tim Holtz Birdcage Ornament

Yes, yes... more shabby goodness today!  I was trying to figure out what projects to make for the next Stamp Camp (we are on #3 already!)  Debi and I decided to do a Christmas theme for the next class.  For the past 2 years, I've been doing Christmas themed classes in the second half of the year, but I've been so busy this year, I haven't been able to plan that many Christmas projects.  So I asked Debi if she wanted to do a Christmas themed Stamp Camp to satisfy the "regulars" that were asking for Christmas.  She loved the idea, so we've been trying to brainstorm what we are going to teach.

I've been getting a lot of inspiration from You Tube recently- looking for more shabby inspiration.  And I stumbled upon several tutorials on how to make a 3-D bridcage using the Tim Holtz Sizzix die.  I loved the results I saw, so I tried to make one to see if it was feasible for our class.  I think it took me awhile, only because I was trying to figure out how to decorate it. The actual construction wasn't that bad.  Here's the link to the tutorial I used to make this one, but there are several different tutorials out there.

On to my project... So I cut 4 of the Tim Holtz bird cage die out of this old paper from my stash.  I wanted it to have that shabby look, so I chose to use the side with the script writing on cream. The other side was a nice aqua color, which goes with my shabby chicness!  Perfecto!  I guess you need to keep the backside of the cardstock you are planning on using in mind since it will show.


I decorated the outside of the birdcage using some Tim Holtz ribbon trim.  It had an elastic ruffle, so I glued on some pearl trim to cover the elastic.  Then I glued on some roses by Wild Orchid Crafts along the bottom of the cage.


On the top of the cage, I used the Tim Holtz seambinding and inked it up using my Spun Sugar Distress ink pad.  I went direct to ribbon using the pad.  I thought I had the Spun Sugar stain, but I guess I don't.  Guess I'd better add that to my wish list!  The color matched perfectly!


Now, I don't know if you can see this, but I wanted to take a pix of the inside of the cage.  I added some roses to the cage floor then stuck the bird (also from the same die) into the roses, which helped the bird to stay up.  I added some glitter to the bird's breast and wing so you could see the difference even though I was using the same colors. I think next time I'll add some pearls to the bottom of the cage too.


I am liking this birdcage idea!  I wonder if TH had that in mind when he made it or if his followers just came up with a great idea!  I really don't know who came up with this brain child, but it was pretty ingenious!

I need to tweak it a bit since I don't know about the whole shabby chic look for the class.  If I come up with a newer version, I 'll share it here.

Wednesday, August 15, 2012

Not Too Shabby?

Yes!  Another shabby project to share with you today!  I can finally share this one since I gave it to my CBFF Debi this past weekend.  Debi is my go to gal when it comes to crafts, my business, and just everything!  Thanks Debi for being a great friend!

Since she's helped me so much over the past year with Sister Stamps, I decided to make her something to thank her.  Plus it gave me a good excuse to make this....


Any guesses?  Well, it started out as an easel frame, but I took out the glass and backing and replaced it with chicken wire.. Yes, that was me at Ace Hardware buying a couple yards of chicken wire.  Who knew?  I painted it white for a more shabby distressed look and in hopes that it will not rust as fast.  So what is it?  Well, I've seen several versions of this project while blog hopping and most of them are either used as an earring/jewelry holder, or message board. Debi said she was going to use it as an earring holder.  Yay!

I wasn't sure what colors Debi would like, so I was kinda nervous when I gave it to her.  I really wanted to use my blue so I just went for it in hopes she would like it too.  Before I added the flowers, I framed the opening with some faux rhinestone bling.  It was actually a double row, but I cut it down since the frame itself was not too wide and it would have covered most of the frame.  Then I went to town gluing on the roses and gardenias.  Added some brown for a more vintage feel.  After gluing down the flowers, I used my silver ice stickles on the flowers for more bling.  All flowers are by Wild Orchid Crafts and I am Roses.


Here you can kinda see the bling trim...

Thanks again Debi for all your help over the past year! Hope you guys enjoyed this project!

Monday, August 13, 2012

Feeling Shabby

As you already know... I'm always a step behind the trends.  Maybe it's because I live in Hilo?  Maybe not... I always seem to like what was cool or has been cool for awhile.  So I've finally caught up with my friends on the whole Shabby Chic trend.  Yes only now.  I think it has something to do with the fact that I don't really like painting all that much and you normally need to lay down some paint on altered projects before you can embellish.

So I broke down, bought a few shabby colors, ordered me some shabby roses and attempted my first shabby birdhouse project.  I found this wood birdhouse at Ben Franklin. It came without the stand, but I've seen many around that have bird houses on stands, so I wanted one too. Unfortunately, I couldn't find any with a stand, so I improvised.  In the wood section, I found a candle stick- go figure!?  But it was the perfect size and height to become my birdhouse stand!  Yay!

First I painted the house portion white. Its more of an off white.  Then I added glitter cause I still needed some bling.  I went with a pink roof and stand- shabby chic pink that is.  Let me tell ya that it was pretty hard  working with such light pastel colors, but I was determined to do it.

After a few coats of paint, it was time to embellish!  I pulled out my recently purchased stash of shabby goodies and armed myself with a glue gun and went to town! 


First let me show you the roof- that's where I started... Added some pearl trim, which was actually a double strip of pearls from Michael's Recollections line.  I am almost out so I need to get some when I go on my next trip! I think it was worth using my hoarded stash for a project that will not be given away.  Now let me point out my little birdie!  I found him at Ben Franklin too.  I was so happy to find a small pink birdie!  She fit perfectly in my bird house- Yay!

Before adding my new friend, I started working on the roses.  I stuck to the whole pink, light pink, aqua and gray tones.  Love it!  Added in a small spray on the left.  Don't know if you can see it but I also lined the bottom of the bird house with pearl trim.


Next is a shot of the stand or candlestick.  My friend Mrs. Lum  had given me that cute vine garland you see wrapped around the stand.  I love it!  I love it so much I got me some more in other colors.  Thanks Mrs. Lum!  Then I added more flowers and a white butterfly cut from glitter paper (you can't see the glitter but it's there).  Added some pink pearl embellishment for the body.  The butterfly die is by CC's Designs.


Here's the side view of the bird house.  Just wanted to show that I used more roses and butterflies on the other side of the house.

So are you now a shabby chic fan too?  I had a lot of fun making this bird house.  It's going in my newly decorated craft room.  I'm still working on organizing it, but hopefully I will be able to share some pictures soon.   Come visit soon for more shabby projects!

Wednesday, August 8, 2012

2nd Attempt

As you can see, I can't get enough of that masking technique.  I tried using Distress inks this time, but had a harder time.  Not sure if its cause its water based? Whatever it is, I had a harder time, but managed to come up with this card.  The large butterfly is Penny Black and the rest of the stamps are by Hero Arts.  I guess I gotta keep practicing!


Tuesday, August 7, 2012

CASE'ing Heather

While blogging, I stumbled upon a blog called Bits and Pieces by Heather Telford.  I immediately fell in love with her style and spent days studying her work.  (Yes, I study).  She used a masking technique using post its to create these one layer cards using sponging.

I thought this would be a great technique for my upcoming class, so I bought me some post its to test it out.  It wasn't as easy as I thought it would be!  I'm really loving this technique and need to practice!


The large butterfly is a Penny Black stamp (can you tell its my new favorite!), and the rest of the stamps are Hero Arts.  The inks used are Momento.. never even thought of using Momento inks in this way before.  Thank you Heather for the great inspiration!  Be sure to check out her other cards here...